
Capturing stunning long exposure star photos is a challenge many astrophotographers face, but with the right equipment and techniques, you can achieve breathtaking results. The key to a successful long exposure shot lies in capturing enough light to reveal the intricate details of celestial bodies, while minimizing noise and distortion. However, many photographers struggle with finding the perfect balance between exposure time, ISO, and aperture to freeze star movement without introducing unwanted artifacts.
In this comprehensive guide, we’ll walk you through the essential equipment needed, including a sturdy tripod and a camera capable of manual adjustments. You’ll learn how to set your camera settings for optimal results, from choosing the right ISO to calibrating your white balance for accurate colors. We’ll also cover post-processing techniques to refine your images, including noise reduction methods and color grading tools. By the end of this article, you’ll have the knowledge to capture stunning long exposure star photos that showcase the beauty of the night sky.
Understanding Long Exposure Photography
To capture stunning long exposure star trails, it’s essential to understand how camera settings and timing work together to achieve this effect. We’ll break down the key factors involved in producing these breathtaking images.
What is Long Exposure?
Long exposure photography involves capturing images over an extended period, typically ranging from a few seconds to several minutes. This technique allows you to freeze motion and convey dynamic effects by reducing the impact of camera shake and noise.
By adjusting the shutter speed or using a neutral density (ND) filter, photographers can achieve longer exposures that reveal subtle details in low-light scenes. The application of long exposure photography is particularly suited for capturing stars in the night sky.
For example, to capture the Milky Way’s wispy tendrils, you might use an 8-10 second exposure with an ND filter. This reveals delicate patterns and textures not visible at shorter shutter speeds. In contrast, attempting a shorter exposure risks overexposing the image due to the camera’s sensitivity to starlight.
When planning long exposure shots, consider the ambient light in your scene. A darker environment minimizes unwanted light pollution and allows you to maintain slower shutter speeds without overexposure. Be cautious when capturing bright foreground elements, as these can quickly become blown out by prolonged exposures.
Benefits of Long Exposure for Star Photography
When you use long exposure for star photography, one of the primary benefits is a significant reduction in noise. This is particularly important when capturing faint celestial objects. In standard exposures, stars are often represented as tiny points due to their brightness exceeding the sensor’s capacity. However, with longer exposures, more light is gathered, allowing these points to grow and take on a star-like appearance.
Long exposure also enables you to capture more detail in your images. By opening up the camera’s shutter for several seconds or even minutes, you can collect enough light to bring out subtle textures and patterns within the stars themselves. For instance, the wispy tendrils of a nebula or the intricate swirls of a galaxy become visible.
To achieve optimal results, it’s essential to balance exposure time with image stabilization. A tripod and mirror lockup can help minimize camera shake and ensure crisp images. Additionally, consider using a camera with good low-light performance and sufficient dynamic range to capture the full extent of the starry scene.
Preparing Your Camera for Long Exposure
For long exposure star photography, preparing your camera is just as crucial as choosing a suitable location. Start by setting your camera to manual mode, ensuring you have full control over aperture, shutter speed, and ISO settings. A wide-angle lens with an f-stop of at least 2.8 is recommended for capturing the night sky.
Next, attach your camera to a sturdy tripod that can support its weight, considering both the camera itself and any additional equipment like lenses or remote shutters. Avoid tripods with loose or creaky joints, as they may introduce unwanted vibrations during long exposures. You’ll also need a remote shutter release or a camera timer to prevent any accidental movements.
Lastly, check your camera’s battery life and bring extra power sources if necessary. You don’t want to be caught without a fully charged battery in the middle of a shoot. A battery grip can help extend shooting time but may add weight to your setup, so weigh your options carefully based on your specific needs.
Choosing the Right Equipment
When it comes to capturing breathtaking long exposure star shots, selecting the right equipment is crucial to avoid disappointment. You’ll want to ensure your gear can handle the necessary exposures and provide clear, noise-free images of the stars.
Essential Gear for Star Photography
When shooting long exposure stars, a sturdy tripod is essential for maintaining camera stability and preventing camera shake. Look for a tripod with a sturdy base plate and a smooth panhead to ensure precise control over camera movements. The legs should be adjustable to accommodate uneven terrain, and consider a ballhead for easier panning.
A wide-angle lens is also crucial for capturing the vastness of starry skies. Lenses with focal lengths between 10-24mm are ideal for showcasing the Milky Way’s sprawling tendrils or the majestic sweep of constellations. Consider a lens with a wide aperture (like f/2.8) to allow more light in, reducing exposure times and minimizing noise.
Remote shutters are another must-have gear item. They enable you to trigger the camera without physically touching it, eliminating vibrations that can blur star trails. Wireless remote shutter releases or smartphone apps can be used for hands-free triggering, allowing you to compose and focus shots without disturbing the camera. When choosing a remote shutter, ensure compatibility with your camera model and consider the range and reliability of the signal.
Camera Settings for Long Exposure
When it comes to capturing the stars’ trails, you’ll want to adjust your camera settings for optimal results. A low ISO is essential to minimize digital noise and prevent overexposure. A setting of 800 or lower is usually sufficient, but this may vary depending on your camera’s sensitivity and the light pollution in your area.
The aperture should be set between f/2.8 and f/5.6, allowing a sufficient amount of light to enter while maintaining a sharp image of the stars. However, if you’re using a lens with a wide aperture (like an f/1.4 or f/2), you may want to stop it down slightly to ensure a more even exposure.
Shutter speed is where the magic happens – the longer the better, but be mindful of camera shake and star trailing. Typically, exposures range from 20 seconds to several minutes. For urban areas with heavy light pollution, a shorter shutter speed might be necessary, whereas for dark-sky locations, you can push it up to an hour or more.
Image Processing Software for Stars
Image processing software is a crucial tool for enhancing long exposure star photos. While camera settings and equipment play a significant role in capturing the desired effect, post-processing can elevate the image to its full potential. Adobe Lightroom and Photoshop are two popular options for image processing software.
Lightroom excels at batch processing and organization, allowing you to apply adjustments across multiple images with ease. This is particularly useful when shooting in RAW format, as it provides more flexibility during editing. The software’s HDR merge feature also enables the creation of stunning high-dynamic-range images from bracketed shots. However, Lightroom might not be ideal for detailed adjustments or intricate manipulations.
Photoshop, on the other hand, offers an extensive range of tools for fine-tuning and retouching individual images. Its advanced features include layer blending modes, masking techniques, and precise color grading. When choosing between these two options, consider your specific needs: if you require bulk processing and organizational capabilities, Lightroom might be the better choice; if you need more control over intricate adjustments, Photoshop is likely the way to go.
Planning Your Star Photography Session
To plan a successful star photography session, you’ll need to consider factors such as equipment, location, and timing to ensure optimal results. Choosing the right gear is just the beginning.
Understanding Weather Conditions
Cloud cover is a significant factor to consider when planning your star photography session. Thin clouds can sometimes be beneficial, as they add depth and texture to the image. However, thick clouds will completely block the light from the stars. It’s essential to check cloud forecasts for your location before heading out.
The moon phase also affects long exposure photography. A new moon is ideal for capturing the stars, but a full moon can make it challenging. The moon’s light can overpower the faint starlight, causing overexposure. If you’re planning to photograph during a full moon, consider using a longer exposure time or adjusting your camera settings accordingly.
Atmospheric clarity is another crucial consideration. Air pollution and humidity can scatter light, making the stars appear softer and less distinct. Try to plan your session for times when atmospheric conditions are optimal – typically early morning or late evening hours after a clear day. This allows you to capture the stars in a relatively stable atmosphere with minimal air turbulence.
Identifying the Best Locations for Star Photography
When it comes to capturing stunning star trails and galaxies with long exposure photography, the location is just as crucial as the equipment. To identify the best locations for star photography, you’ll want to seek out areas with minimal light pollution.
Start by researching dark-sky preserves or national parks that have been designated as dark sky sanctuaries. These areas are protected from artificial lighting and offer optimal stargazing conditions. For example, Death Valley National Park in California is renowned for its incredibly dark skies. Similarly, the Atacama Desert in Chile has some of the darkest skies on Earth.
Consider locations far from urban centers and major highways, as these often contribute to light pollution. Even small towns can have a significant impact, so it’s essential to choose areas with minimal artificial lighting. Additionally, look for sites with low cloud cover during your shooting period. A full moon can also impact the quality of star photos, so aim for new moon cycles if possible.
Scheduling Your Star Photography Session
Plan your star photography session around celestial events like meteor showers or planetary alignments to capture breathtaking long exposure shots. These events offer unique opportunities to add drama and interest to your images.
For example, during a major meteor shower like the Perseid meteor shower in August, you can capture stunning trails of shooting stars against the night sky. Plan your shoot for around 2 am when the meteors are most active, and set your camera to a long exposure time of at least 30 seconds to capture the streaks.
Similarly, during planetary alignments like the opposition of Jupiter or Saturn, you can use the planets as foreground elements in your composition. Research the alignment and plan your shoot for when the planet is highest in the sky, usually around midnight or 1 am.
Consider downloading a planetarium app or using online tools to help you plan your session. These resources allow you to visualize the celestial events and plan your shots accordingly. By timing your shoot with these events, you can create long exposure star photos that are truly out of this world.
Capturing Stunning Long Exposure Stars
Now that you’ve got a basic understanding of long exposure photography, let’s dive into capturing those stunning starry nights by perfecting your technique for achieving silky smooth skies.
Techniques for Reducing Noise in Long Exposure Photos
Image stacking is a popular technique for reducing noise in long exposure star photos. By combining multiple images of the same scene, taken at the same exposure settings, you can create a single image with reduced noise and increased detail. This works because noise tends to be random and unique to each individual frame, so when you combine them, the noisy areas tend to cancel out. To stack images effectively, use software like Adobe Photoshop or StarStax, which offer tools specifically designed for this purpose.
Another approach is to use noise reduction software, such as Noise Reduction in Lightroom or Topaz DeNoise. These programs analyze your image and identify areas where noise is present, allowing you to selectively reduce it while preserving details. When using these tools, be cautious not to overdo it – excessive noise reduction can lead to an unnatural appearance. It’s essential to monitor the results closely and make adjustments as needed to maintain the desired balance between noise reduction and detail preservation. Experiment with different settings and techniques to find what works best for your specific images.
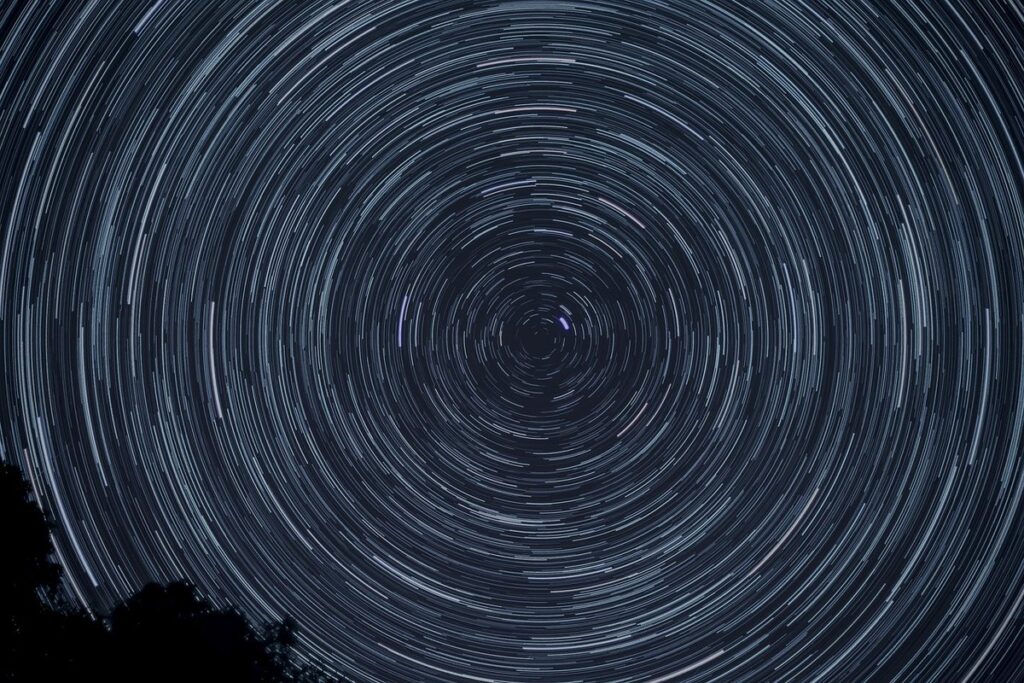
Creating Star Trails with Long Exposure
To create stunning star trails using long exposure photography, you need to set your camera to capture multiple images over a prolonged period. This can be done by taking individual exposures of 20-30 seconds each, or combining shorter exposures into a single image. The latter approach is often preferred as it reduces noise and ensures more accurate color representation.
When shooting star trails, use a sturdy tripod to maintain camera stability. Set your camera to Manual mode and adjust the aperture to f/2.8 or wider for optimal results. A lower ISO (around 800-1600) will help minimize noise. Bracketing your exposures by 1-2 stops allows you to capture a range of light levels, making post-processing easier.
In post-processing, combine multiple images using StarStax or Adobe Photoshop’s HDR feature. This technique is called image stacking. By merging the images, you can achieve stunning star trails that appear as sweeping brushstrokes across your photograph. Experiment with different exposure times and settings to capture unique patterns and effects.
Enhancing Your Long Exposure Star Photos
When enhancing your long exposure star photos, color grading is a crucial step to bring out the subtle tones and textures of the stars. You can use software like Lightroom or Photoshop to adjust the white balance and temperature to create a more natural look. For example, if you’ve shot in daylight-balanced mode, you may want to shift the color grade to a cooler tone to better match the star’s natural hue.
Contrast adjustments are also essential to make your stars stand out from the background. You can use local contrast tools or global adjustments to increase the brightness of the stars while maintaining the dark shadows. Be cautious not to overdo it, as this can result in an unnatural look. Instead, aim for a subtle balance between light and dark areas.
Texture options can add depth and interest to your long exposure star photos. You can use noise reduction tools or apply texture overlays to create a more organic feel. Some photographers also experiment with layering multiple exposures to achieve unique textures and effects.
Common Mistakes to Avoid in Long Exposure Star Photography
When it comes to capturing stunning long exposure star shots, there are a few crucial mistakes you can make that will ruin an otherwise perfect night. Here’s how to avoid those common pitfalls and achieve breathtaking results.
Understanding and Addressing Camera Shake
Camera shake can be a major contributor to blurred stars and compromised images. Typically, it occurs when the camera is not mounted securely on a tripod, or when the photographer touches the camera while taking a long exposure shot. In most cases, camera shake is caused by human error rather than equipment failure.
To identify if your image has been affected by camera shake, examine the star trails. If they appear fuzzy or distorted, it’s likely due to camera movement. A small minority of photographers use electronic first curtain shutter (EFCS) or mirror lockup features to minimize camera shake. However, these features may not completely eliminate the problem.
To prevent camera shake during long exposure photography, ensure your tripod is sturdy and levelled. Use a remote shutter release or the camera’s timer to avoid touching the camera while taking the shot. For added security, consider investing in a cable release or an intervalometer that can be programmed to take multiple shots at set intervals. This will help you capture sharper star images by minimizing manual intervention during exposure.
Managing Battery Drain and Power Outages
When shooting long exposure star photography, battery drain and power outages can be a significant issue. This is often due to prolonged periods of camera operation without adequate power reserves. To mitigate this risk, it’s essential to have a reliable external power source. Consider investing in a battery grip or an external battery pack specifically designed for your camera model.
These devices provide additional juice when needed and can be charged in advance to ensure you have a full reserve during critical moments. For example, if you’re shooting a prolonged exposure at 30 seconds, it’s best to start with a fully charged battery to avoid mid-exposure interruptions. Additionally, keep spare batteries on hand for quick swaps if needed.
When planning your shoot, take note of the expected time of day and weather conditions, as these can affect power consumption. If you’re shooting in extremely cold temperatures, be prepared for increased battery drain due to reduced camera efficiency.
Advanced Techniques for Long Exposure Stars
To truly push the boundaries of long exposure stars, you’ll want to master techniques like interval shooting and multiple shot stacking. These advanced methods require some practice, but can produce stunning results.
Using Intervalometers for Timelapse Photography
When working on long exposure star photography, many photographers want to create timelapse videos showcasing the movement of celestial bodies. Intervalometers are a valuable tool for achieving this effect. These devices can be set to capture images at precise intervals, allowing you to record the motion of stars over a prolonged period.
To get started with intervalometry, choose an intervalometer that supports your camera’s connection type and has adjustable timing settings. Some popular options include the Canon Timer Remote and the Intec Intervalometer. Connect the device to your camera and set it to capture images at intervals ranging from 5-30 seconds, depending on the desired speed of the timelapse.
It’s also essential to consider the total number of exposures you’ll need for a smooth timelapse video. Typically, a 2-minute video requires around 100-200 images. Be sure to format your memory card with the correct file structure and naming convention to streamline the post-processing workflow. This will help ensure seamless integration with editing software like Adobe Premiere Pro or Final Cut Pro.
Creating Panoramic Star Photos with Stitching Software
Panoramic stitching software is a game-changer for astrophotographers looking to capture breathtaking wide-angle star photos. This technique allows you to merge multiple images taken with different camera positions, creating a seamless and highly detailed panoramic view of the night sky.
To get started, choose a stitching software that suits your needs, such as Adobe Photoshop or AutoPano Pro. Familiarize yourself with the program’s interface and adjust settings according to the type of panorama you’re trying to create. For example, if you’re aiming for a wide-angle shot, set the camera angle accordingly.
When capturing images, it’s essential to maintain consistent exposure levels and camera positions across all shots. This ensures that the software can accurately stitch the photos together without any noticeable artifacts. Typically, a small overlap (about 10-20%) between each image is recommended to ensure seamless stitching.
As you experiment with panoramic stitching, keep an eye on your resulting images’ quality and make adjustments as needed. Some common issues include distortion, vignetting, or mismatched exposure levels. With practice and patience, however, you’ll be able to produce stunning panoramic star photos that showcase the night sky’s grandeur.
Conclusion: Mastering Long Exposure Stars
Mastering long exposure stars requires patience, practice, and persistence. It’s not just about pointing your camera at the sky and waiting for the stars to come into focus. You need to understand how to use a tripod, what type of lens is best suited for this technique, and how to calculate the ideal shutter speed.
To get started, experiment with different exposure times in a controlled environment, such as a dark room or under a city light. This will help you gauge your camera’s performance and make necessary adjustments. Practice shooting during different weather conditions, like clear skies and moonless nights, to learn how they affect star visibility.
As you refine your skills, pay attention to post-processing techniques, where contrast and noise reduction can greatly impact the final image. Don’t be afraid to try new approaches or revisit familiar scenes with fresh eyes – mastering long exposure stars is a continuous learning process.
Frequently Asked Questions
Can I use long exposure photography during cloudy weather?
Yes, you can still capture stunning star photos on cloudy nights by using a longer exposure time to compensate for the reduced light. However, be aware that clouds may introduce noise or artifacts in your image.
How do I prevent battery drain and power outages while shooting long exposures at night?
To minimize battery drain, consider bringing extra batteries and keeping your camera’s power settings optimized. For power outages, use a portable power bank or invest in a backup power source specifically designed for outdoor photography.
What if the recommended equipment is not within my budget? Are there any affordable alternatives?
While high-end equipment can enhance long exposure star photography, you can still achieve great results with more affordable options. Look into buying second-hand gear or opting for DIY solutions, such as using a smartphone app for remote shutter control.
Can I combine long exposure photography with other techniques, like timelapse or panoramic stitching?
Yes, long exposure photography can be combined with other techniques to create stunning and unique visuals. Experiment with combining long exposure with timelapse, panoramic stitching, or even hyperlapse to push the boundaries of your creativity.
Is it safe to shoot long exposures in areas with high levels of light pollution?
While it’s tempting to capture stars in urban environments, shooting long exposures in areas with high light pollution can introduce unwanted noise and artifacts into your image. Opt for locations with minimal light pollution for the best results.