
Drawing birds in flight can be a thrilling experience for nature lovers and artists alike. Not only does it allow us to capture the beauty of these creatures, but it also requires us to understand the intricate mechanics of their flight. But what makes drawing birds in motion so challenging? Is it the way they spread their wings, or the precise angles of their feathers? Whatever your skill level, mastering bird flying drawings can be a rewarding and creative pursuit.
In this comprehensive guide, we’ll take you through the essential elements of bird anatomy, exploring how different species’ wing structures influence their flight patterns. We’ll also delve into the key principles of flight mechanics, explaining what makes birds soar effortlessly through the skies. By combining these fundamental concepts with practical drawing techniques, you’ll learn to capture the dynamic movement and realism of wings in motion.
Understanding Bird Anatomy and Flight Mechanics
To master the art of drawing birds in flight, it’s essential to understand their unique anatomy and the intricate mechanics that allow them to soar through the air. Let’s take a closer look at the fascinating science behind bird flight.
Recognizing Key Features in Bird Skeletons and Muscles
When drawing birds in flight, it’s essential to understand the unique skeletal and muscular features that enable them to soar through the air. Let’s take a closer look at some key features you should replicate in your artwork.
Firstly, notice how the wing structure is made up of three bones: the humerus (upper arm bone), radius and ulna (forearm bones), and carpals, metacarpals, and phalanges (hand bones). These bones are connected by a system of joints that allow for flexibility and movement. When drawing a bird in flight, pay attention to how these bones are aligned to create the wing’s shape.
The keel bone is another critical feature you should include in your artwork. Located at the base of the breastbone, it serves as an anchor point for the powerful pectoral muscles that power a bird’s wings during flight. These muscles are composed of two main groups: the pectoralis major and minor. The pectoralis major muscle is responsible for extending the wing, while the minor muscle assists in its movement.
When drawing a bird’s muscles, remember to illustrate their attachment points on the skeleton, particularly around the keel bone. This will help you accurately depict the relationship between the muscles and the bones that enable flight. By understanding these key features, you’ll be able to capture the majesty of birds in motion with more accuracy and realism in your artwork.
The Science Behind Wing Movement and Lift Generation
Bird flight is an incredible display of aerodynamic engineering, and understanding its fundamental principles can elevate your bird flying drawing to new heights. Let’s dive into the science behind wing movement and lift generation.
Cambered wings are a hallmark of avian anatomy, allowing birds to produce lift forces that counteract their weight. The curved upper surface of the wing deflects air downward, creating an area of lower air pressure above the wing. This pressure difference generates an upward force – lift – which keeps the bird aloft. Imagine drawing a gentle curve on your paper, mirroring the shape of a bird’s wing; this subtle detail can make all the difference in capturing the essence of flight.
As air flows over the wing, it accelerates, and its pressure drops. This principle is known as Bernoulli’s effect. To illustrate this concept, think of drawing two parallel lines – one smooth, one wavy – to represent airflow over a cambered wing. The smooth line indicates lower pressure above the wing, while the wavy line represents faster air flow and increased pressure below.
When drawing birds in flight, remember that lift forces are not constant; they vary depending on wing angle, shape, and movement. To capture this dynamic aspect, experiment with subtle changes in wing curvature and orientation – just as a bird would adjust its wings to navigate through different environments.
Basic Drawing Techniques for Birds in Flight
To master the art of drawing birds in flight, it’s essential to understand some basic techniques that will help you capture their dynamic movement and fluid motion on paper. Let’s dive into these fundamental skills together!
Mastering Line Art and Gesture Drawing
When capturing the dynamic movement of birds in flight, gesture drawing and line art techniques become essential tools for any artist. To effectively convey the fluid motion of these avian creatures, start by paying attention to the bird’s pose at different stages of its flight cycle.
Observe how a bird’s body language changes as it prepares to take off, mid-flight, or landing. Note the subtle tilts of the head, the tension in the neck, and the spread of the wings. Practice capturing these moments through quick gesture drawings using loose lines and minimal details. This will help you develop your observation skills and internalize the bird’s movement.
Focus on capturing the gestural poses rather than precise details. Use line art to convey energy and movement by varying line weights and textures. For example, a thick, expressive line can be used for the wing’s leading edge, while a finer line can capture the delicate feathers around the head. As you practice, your lines will begin to dance across the paper, accurately conveying the bird’s dynamic movement in flight.
Understanding Proportion and Measurement
When it comes to drawing birds in flight, getting the proportions right is crucial for creating a realistic and visually appealing piece. To accurately measure bird proportions, start by observing the subject itself – study photos of different bird species, paying attention to their body length, wingspan, and tail length.
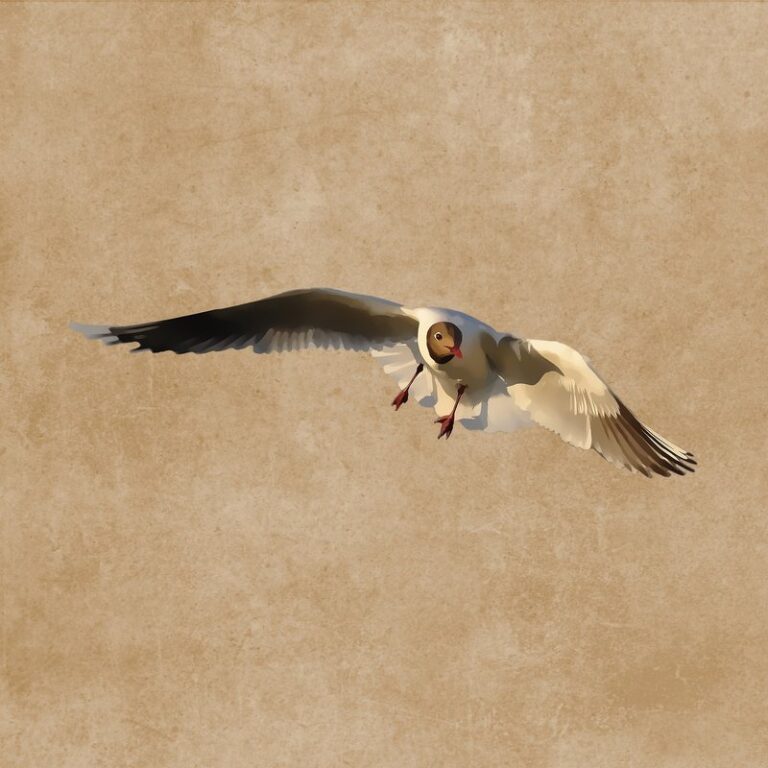
Notice how the wingspan is usually about 1.5 to 2 times the body length? This rule applies to many bird species, but not all, so it’s essential to research specific proportions for the type of bird you’re drawing. For example, a seagull has a relatively short wingspan compared to its body length.
To render realistic wingspans and tail lengths, try measuring these elements by dividing them into smaller parts – for instance, breaking down the wings into their primary feathers, secondaries, and tip. This will help you get an accurate sense of proportion and avoid squaring off the bird’s wings or making them too long or short.
Remember that practice makes perfect, so don’t be afraid to sketch and experiment with different proportions before committing to your final piece.
Realistic Bird Portraiture: Tips and Tricks
When creating a realistic bird portrait, it can be challenging to capture the subtle nuances of feather texture and pattern, but with these expert tips, you’ll master it in no time.
Capturing Expressive Feathers and Plumage
When capturing expressive feathers and plumage in your bird flying drawing, it’s essential to pay attention to texture, pattern, and color. Start by studying the shapes and forms of individual feathers on different bird species – each type has its unique characteristics.
Observe how feathers grow from the body in clusters or individually, overlapping one another to create layers of texture. Note the intricate patterns found on many birds’ feathers, such as stripes, spots, or swirling designs. These patterns not only contribute to a bird’s visual appeal but also serve functional purposes like camouflage or display during courtship.
To render these details accurately, use a range of tools and techniques. For example, you can employ hatching with fine pens or pencils to suggest the layered structure of feathers. Soft brushes and textured media can add depth and tactile quality to your work. When capturing color, consider the bird’s habitat, diet, and overall appearance to ensure accuracy.
Study reference images carefully, taking note of how light interacts with different feather types. Practice observing these details in real life – visit a local zoo or park, and spend time observing birds up close. By studying and replicating these intricate elements, you’ll be able to capture the essence of your subject’s plumage and bring it to life on paper.
Achieving Authentic Eye Expression and Facial Details
When drawing realistic birds in flight, capturing their facial expressions can be just as crucial as conveying movement and action. To achieve authentic eye expression and facial details, consider the unique characteristics of different bird species.
For example, a raptor’s gaze is typically intense and piercing, while a waterfowl’s eyes may appear softer and more rounded. Experiment with varying shapes and sizes for the pupils to capture these subtle differences. The beak shape can also convey personality – a sharp, hooked beak might suggest aggression or assertiveness, whereas a curved, gentle beak could imply timidity.
As you render your bird’s face, pay attention to the overall symmetry of its features. Note how some birds have distinctive markings around their eyes, such as feathers or patches that can add depth and character. To create realistic facial details, focus on subtle texture and pattern variations rather than trying to replicate exact likenesses.
Bird Flying Drawing Exercises and Prompts
Now that you’ve got a handle on basic bird flying poses, it’s time to dive into some fun exercises and prompts to help take your drawing skills to new heights.
Guided Exercises to Develop Your Skills
As you progress through this guide, it’s essential to practice what you’ve learned so far. That’s why we’re moving on to guided exercises designed to help you develop your skills in drawing birds in flight. These exercises cater to different skill levels, from beginners who want to learn the basics of bird flying poses to more experienced artists looking to refine their compositions.
Let’s start with simple sketches: Try drawing a bird in mid-air using just three lines – two for the wings and one for the body. Focus on capturing the dynamic movement, rather than the details. Then, gradually add more lines to create basic shapes and silhouettes. Practice this exercise with different birds, adjusting their poses and flight paths.
To take it up a notch, practice drawing birds in various contexts: flying over water, through trees, or alongside other birds. You can also experiment with capturing specific moments – like takeoff, landing, or gliding in search of food. Remember to pay attention to the bird’s posture, feathers, and wings’ movement as they interact with their environment.
Project Ideas for Inspired Artists: Creating Your Own Bird-Themed Masterpieces
As an inspired artist, you’re probably itching to create your own bird-themed masterpieces. Let’s get started with some exciting project ideas that will take your bird flying drawing skills to the next level!
When it comes to incorporating realistic flying poses into larger pieces, think about the story you want to tell through your artwork. Imagine a majestic eagle soaring above a serene mountain landscape or a flock of birds in mid-air above a bustling cityscape. To achieve this, consider using a mix of loose and detailed brushstrokes to convey movement and energy.
For instance, try combining a watercolor background with colored pencils or markers to create intricate patterns and textures. You could also experiment with layering multiple pieces of artwork to create a sense of depth and dimensionality. For example, paint the birds in mid-air on one layer, and then add a subtle landscape or abstract pattern below.
Some other ideas to get you started include:
• Creating a diorama using cardboard boxes, paper mache, or clay to create a 3D effect.
• Designing a series of bird-themed prints or cards featuring different flying poses.
• Illustrating a fantastical scene where birds are interacting with their environment in creative ways.
Tips for Drawing Different Species of Birds
Now that you’ve mastered the basics, let’s take your bird flying drawing skills to the next level by learning how to draw different species of birds accurately. We’ll cover the key characteristics of popular bird types.
Understanding Unique Characteristics and Features
When drawing different species of birds in flight, it’s essential to capture their unique characteristics and features. Each bird type has distinct adaptations that affect its flight pattern, making it crucial to understand these differences to create an accurate representation.
Consider the swift, for example. With their narrow wings and long, pointed tails, they have a streamlined silhouette that enables them to reach incredible speeds while in flight. To accurately depict a swift in your drawing, focus on elongating the body and emphasizing the tail feathers.
Similarly, birds like owls have broad wings and short, rounded tails, allowing for slow, deliberate flight. When drawing an owl, pay attention to its wing shape and tail size to convey this distinctive flying style. Understanding these specific characteristics will help you capture the essence of each bird species in your artwork.
Essential Reference Resources for Realistic Bird Portraiture
When it comes to drawing realistic bird portraiture, having access to the right reference resources is crucial. Field guides are an excellent starting point, providing detailed descriptions and illustrations of various bird species. Look for guides that focus on your target region or species, as they will offer more accurate depictions of local plumage patterns and habitats.
Online resources like eBird, Audubon Society, and the Cornell Lab of Ornithology’s All About Birds are also invaluable tools. These websites offer a wealth of information on bird identification, including images, videos, and range maps. Additionally, museums and zoos often have extensive collections of taxidermied birds that can be observed up close.
For more in-depth study, consider visiting local natural history museums or taking a guided tour at a zoo. Observe the shape and texture of feathers, the structure of wings and tails, and note the subtle nuances in plumage patterns. By incorporating these reference resources into your drawing practice, you’ll be able to render birds with greater accuracy and realism.
Common Mistakes to Avoid When Drawing Birds in Flight
When drawing birds in flight, it’s easy to fall into common pitfalls that can make your artwork look stiff and unnatural. Let’s tackle these mistakes head-on to create more believable bird flying drawings.
Recognizing Inaccurate Proportions and Poses
When drawing birds in flight, it’s easy to get carried away with excitement and overlook some crucial details. One common mistake beginners make is misjudging the proportions of their bird’s wings. A soaring eagle, for instance, has longer wings than a tiny sparrow, but they’re not just length-wise – the shape and angle also vary significantly.
A key point to remember is that birds in flight have their wings positioned at an angle, rather than flat against their body like they are when perched. This might seem obvious, but it’s astonishing how often artists forget this subtlety. To get it right, imagine the bird’s wing as a long, curved sail catching the wind – not just a flat appendage stuck to its side.
Another common error is capturing unnatural poses or movements in flight. A bird mid-gliding might seem like an easy target, but there are many ways to botch this. Focus on observing birds in different environments and lighting conditions to get a better sense of their movement patterns. Practice drawing various wing positions – lifted, lowered, and tucked under for takeoff or landing – until they feel natural.
Overcoming Challenges: Tips for Achieving Realistic Bird Flight
Drawing birds in flight can be a challenging task, especially when it comes to achieving realistic movements. However, with practice and patience, you can master the art of conveying bird flight through your drawings. One key aspect is to study real-life bird behavior, observing how they move their wings, tail feathers, and bodies while in flight.
To overcome common challenges, pay attention to wing position, posture, and body orientation. Note that birds have different wing shapes and sizes, which affect their flying styles. For example, hawks and eagles are soaring flyers with broad wingspans, whereas hummingbirds are agile fliers with rapid wingbeats.
Study the motion of a bird’s wings as they flap upwards or downwards, considering how this affects the surrounding air currents and wing pressure. When drawing, break down the movement into key poses to emphasize specific moments in flight. Practice drawing these different poses to achieve a sense of fluidity and dynamic movement in your art.
Frequently Asked Questions
How do I apply my newfound understanding of bird anatomy to create more realistic drawings?
By recognizing key features such as wing shape, feather structure, and skeletal proportions, you can accurately depict the unique characteristics of different bird species. To apply this knowledge, focus on capturing the intricate details of feathers, beaks, and talons in your art. Study reference images of birds in various poses and environments to get a sense of how these features interact with one another.
What are some common mistakes to watch out for when drawing birds in flight?
When drawing birds in motion, it’s essential to avoid inaccurate proportions, stiff wing poses, and exaggerated facial expressions. To achieve realistic bird flight, pay attention to the subtle angles of wings and tail feathers, as well as the dynamic movement of the beak and head. Study the work of experienced bird artists and practice regularly to develop your skills.
How can I ensure my drawings accurately capture the unique characteristics of different bird species?
Each bird species has distinct features that set it apart from others. To draw birds with accuracy, research their specific anatomy, plumage patterns, and behaviors. Consult field guides, online resources, or expert artists for guidance on capturing these distinctive traits. Practice drawing various species to develop your skills and attention to detail.
What’s the best way to practice drawing birds in flight?
To improve your bird flying drawing skills, focus on regular practice with a variety of exercises and prompts. Start by drawing simple poses and gradually move on to more complex scenes. Use reference images and observe real-life birds to get a sense of their movement and behavior. Consider working from life or using software to aid in the drawing process.
Can I use digital tools to help me draw birds in flight, or is traditional media preferred?
Both traditional and digital mediums have their advantages when it comes to drawing birds in flight. Digital tools can offer greater precision and flexibility, while traditional media can provide a more expressive and tactile experience. Experiment with different software and techniques to find what works best for you and your artistic goals.