
Rock tumbling has long been a beloved hobby for gemstone enthusiasts and collectors, allowing them to transform ordinary rocks into dazzling treasures. But what is rock tumbling, exactly? In simple terms, it’s the process of polishing stones to reveal their hidden beauty, and with the right techniques and equipment, anyone can achieve professional-looking results. If you’re new to this fascinating world, don’t worry – we’ve got you covered. This comprehensive guide will walk you through the fundamentals of rock tumbling, covering its history, essential equipment, and advanced techniques. You’ll learn how to choose the right rocks, prepare them for polishing, and perfect your skills to produce stunning gemstones that rival those found in jewelry stores. By the end of this article, you’ll be well on your way to creating your own polished masterpieces with ease and confidence.
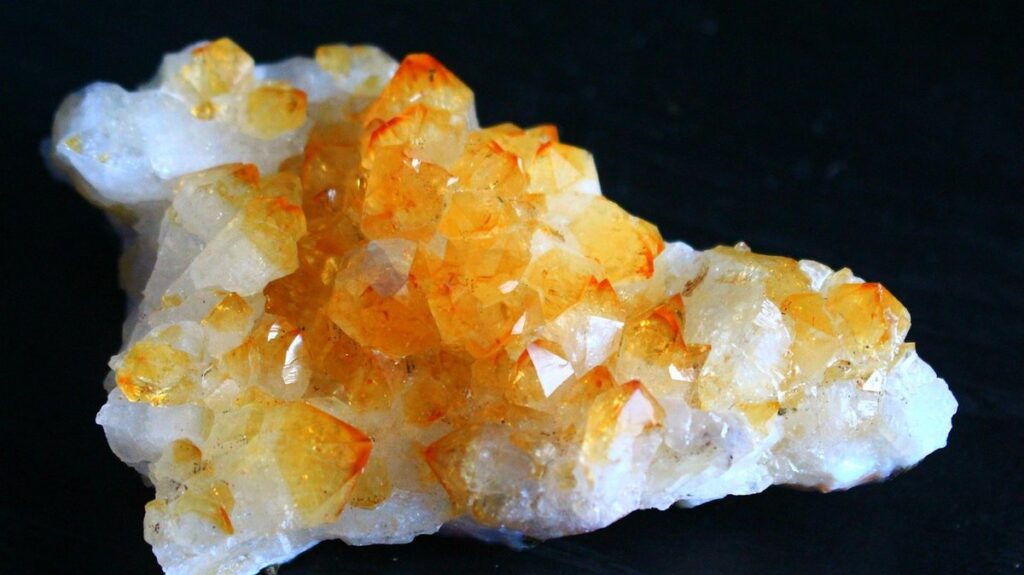
What is Rock Tumbling?
So you want to get started with rock tumbling, but first, let’s cover the basics: what exactly is rock tumbling and how does it work?
History of Rock Tumbling
Rock tumbling has a rich history that spans thousands of years, with its evolution mirroring the development of human civilization. The earliest evidence of rock tumbling dates back to ancient Egypt and Mesopotamia around 2000 BCE, where it was used to polish obsidian and other stones for jewelry and decorative purposes. In ancient Greece and Rome, rock tumbling was a revered art form, with skilled craftsmen creating exquisite polished stones that were highly valued by royalty and nobility.
As civilizations rose and fell, the art of rock tumbling continued to evolve. During the Middle Ages, it became a sought-after skill among monks, who used their knowledge to create beautiful polished stones for churches and cathedrals. In the 18th century, the Industrial Revolution brought mass production techniques to rock tumbling, making it more accessible to the general population.
Today, rock tumbling is enjoyed by enthusiasts worldwide as both a hobby and an art form. With modern machinery and equipment, anyone can learn to tumble rocks at home or in a studio setting. Whether you’re looking to create beautiful polished stones for personal use or seeking a new challenge, understanding the history of rock tumbling provides valuable context and inspiration for your own journey.
Basics of Rock Tumbling Process
Rock tumbling is an ancient process of polishing rocks to their finest form. The technique involves using abrasives to gradually wear away at the rock’s surface, removing imperfections and revealing a smooth, shiny finish. At its core, rock tumbling relies on three fundamental principles: abrasion, cutting, and grinding.
Abrasives are used to polish the rock through a process of gradual removal of tiny particles. This is achieved through a combination of rotating drums or wheels that contain progressively finer abrasives. The most common abrasives used in rock tumbling include silicon carbide (SiC), cerium oxide (CeO2), and aluminum oxide (Al2O3).
The basic steps involved in the rock tumbling process are as follows:
* Cleaning: Washing the rocks to remove dirt, dust, or any other debris.
* Sorting: Separating rocks by size and hardness to prevent damage during the tumbler process.
* Tumbling: Placing the rocks into a rotating drum or wheel with progressively finer abrasives for polishing.
It’s essential to note that rock tumbling is a time-consuming and gentle process. To achieve optimal results, it’s crucial to follow proper steps and allow each stage of the process sufficient time to complete before moving on to the next one.
Choosing the Right Equipment for Rock Tumbling
When it comes to starting your rock tumbling journey, choosing the right equipment is crucial to achieve the best results. Let’s take a look at what you’ll need to get started.
Types of Tumblers: Rotary and Vibratory
When it comes to rock tumbling, two main types of tumblers are commonly used: rotary and vibratory. Understanding their differences is crucial to choosing the right equipment for your project.
Rotary tumblers use a rotating drum to polish rocks, which can be more effective for larger or heavier stones. They’re often preferred by beginners because they’re relatively easy to operate and clean. However, they can be noisy and may not be as precise in their polishing action.
Vibratory tumblers, on the other hand, use a vibrating platform to polish rocks. These tumblers are ideal for smaller or more delicate stones, and are also better suited for precision work. They’re often preferred by experienced rockhounds who need high-precision results.
When deciding between rotary and vibratory tumblers, consider your project’s specific needs. For example, if you’re working with larger rocks, a rotary tumbler may be the better choice. But if you’re polishing small or intricate stones, a vibratory tumbler will provide more precise control over the process.
Essential Accessories for Rock Tumbling
When it comes to rock tumbling, having the right accessories can make all the difference in achieving professional-looking results. As a beginner, it’s essential to know what tools and supplies you’ll need to get started.
First and foremost, you’ll need grits – these are abrasive powders used to smooth out your rocks over time. Start with coarse grits (like 80-100) for removing scratches and imperfections, then move on to finer grits (120-220) for polishing. Don’t forget to use a lubricant like oil or water to prevent loading.
Polish is another crucial component of the tumbling process. There are various types available, including cerium oxide, tin oxide, and aluminum oxide. Choose one that suits your needs based on the type of rock you’re working with.
Cleaning supplies are also vital for removing residue and debris from your equipment. A soft-bristled brush, a mild soap solution, and a drying cloth will help keep your tumbler clean and prevent contamination. Finally, consider investing in a few extra accessories like a rock holder or a polisher’s pad to make the process more efficient. With these essentials on hand, you’ll be well-prepared for your rock tumbling journey.
Grit and Polish Guide for Beginners
Now that you’ve got your rocks tumbling, it’s time to add the finishing touches: polishing them to a brilliant shine. Let’s dive into some beginner-friendly tips on how to polish like a pro!
Understanding the Importance of Grit Sequences
Determining the right grit sequence for rock tumbling is crucial to achieving that showroom shine. When starting out, it’s easy to get caught up in the process and not pay attention to this critical step. However, a well-planned grit sequence can make all the difference between a dull, scratched stone and one that sparkles like diamonds.
So, how do you know when to switch between coarser and finer grits? The general rule of thumb is to start with coarse grits (80-220) to remove any impurities or scratches on the surface. From there, you’ll want to gradually move to finer grits (400-600) for more detailed polishing.
A good example of a well-planned grit sequence would be: 80-100 coarser grit, followed by 220-240 medium grit, and finishing with 400-500 fine grit. The key is to understand that each step should take about 30 minutes to an hour, depending on the stone’s size and material.
Remember, it’s not just about switching from coarse to fine – pay attention to how your stone is responding at each stage. If you notice scratches or unevenness, you may need to go back a few grits and repeat the process before moving forward.
Common Polishes Used in Rock Tumbling
When it comes to polishing rocks, you’ll want to familiarize yourself with the most commonly used polishes. These can be broadly categorized into two types: cerium oxide and aluminum oxide. Cerium oxide is a gentler polish, often preferred for softer stones like agate or jasper. It produces a high-gloss finish without scratching the rock’s surface.
On the other hand, aluminum oxide is a more aggressive polish suitable for harder rocks such as quartz or granite. This polish removes minor scratches and imperfections, resulting in a mirror-like finish. You’ll also come across diamond compound polishes, which are used in the final stages of polishing to create an extremely high-gloss finish.
Other polishes you may encounter include tin oxide and chromium oxide. Tin oxide is gentle enough for use on soft stones, while chromium oxide is often used as a pre-polish or in combination with other polishes to achieve specific effects. When choosing a polish, consider the rock’s hardness and your desired outcome. Experimenting with different combinations will help you find what works best for your projects.
Safety Precautions and Best Practices
Before you start tumbling, it’s essential to familiarize yourself with some crucial safety precautions and best practices to ensure a fun and successful experience. This includes proper handling of equipment and materials.
Protective Gear for Rock Tumblers
When it comes to rock tumbling, safety should always be your top priority. Before you start tumbling those rocks, make sure you’ve got the right gear to protect yourself from potential hazards. This is where protective gear comes in – and trust me, it’s not just a nice-to-have, but a must-have!
First and foremost, you’ll want to invest in a good pair of gloves. Not only will they prevent blisters from forming as you handle rough rocks, but they’ll also protect your hands from cuts and abrasions caused by sharp edges. Look for gloves that are specifically designed for rock tumbling or work with heavy materials – these usually have a textured palm and finger reinforcement to provide extra grip and protection.
Next up is eye protection. Goggles or safety glasses are an absolute must when working with rocks, as tiny particles can fly off during the tumbling process and cause serious damage to your eyes. Choose goggles that fit snugly over your face and wrap around the sides for maximum protection. And don’t forget a dust mask – these tiny rock particles can be breathed in easily, causing respiratory problems down the line.
When shopping for protective gear, make sure to choose products designed specifically with rock tumbling in mind. Not only will they provide better protection, but you’ll also save yourself from buying unnecessary items that won’t do much good in this particular context.
Cleaning Up After a Session
Cleaning up after a rock tumbling session is an essential part of maintaining a safe and healthy workspace. After each session, take a few minutes to clean and sanitize all equipment, including the tumbler, polishing drums, and any other tools used. Use a soft brush or cloth to wipe down surfaces, paying particular attention to areas where grit and water tend to accumulate.
Next, thoroughly clean your workspace by sweeping or vacuuming up debris and dust. Dispose of any waste materials and wash your hands thoroughly with soap and warm water. It’s also important to change your clothing and store any contaminated items in a sealed container to prevent cross-contamination.
Additionally, be sure to check for any signs of damage or wear on equipment and report them promptly to ensure continued performance and safety. Regular cleaning and maintenance will help extend the lifespan of your equipment and prevent costly repairs down the line. Remember to stay focused during cleanup to avoid overlooking important details that can impact future sessions.
Tips for Achieving Professional-Looking Results
To help you take your rock tumbling game to the next level, we’ll share expert tips on achieving professional-looking results in just a few simple steps.
Techniques for Even Polishing
Achieving even polishing is crucial for creating stunning rock tumbled pieces. To achieve this, consider incorporating rotation into your tumbling process. This involves placing the rocks in a rotating drum to ensure consistent exposure to the abrasive medium. As the rocks rotate, the polish will be distributed evenly across each surface.
Another technique to achieve even polishing is through vibration. By adding a vibratory component to your tumbler, you can further enhance the polishing process. This helps to break down any stubborn areas and ensures that all surfaces are polished uniformly.
When it comes to weight distribution, it’s essential to balance the rocks within the drum to prevent overcrowding. Overcrowding can lead to uneven polishing, causing some rocks to become over-polished while others remain under-polished. Aim for a balanced load, ensuring each rock has enough space to move freely and receive equal exposure to the polish.
By implementing these techniques, you’ll be well on your way to achieving professional-looking results in your rock tumbling endeavors.
Troubleshooting Common Issues in Rock Tumbling
Uneven polishing can be frustrating, but it often occurs due to improper tumbling time, uneven loading, or inadequate grit progression. To avoid this issue, ensure you’re following the manufacturer’s recommended tumbling times for your machine and rock type. Load rocks evenly within the barrel to prevent some from being polished more than others. Gradually increase grit levels, starting with coarse grit and progressing to finer grits.
Discoloration can be a result of inadequate cleaning or improper use of chemicals. Regularly clean your tumbler and supplies with soap and water to remove residue. Avoid using harsh chemicals, as they can damage rocks and affect their color. If you notice discoloration during the tumbling process, stop the machine and inspect the rock’s surface. If necessary, re-polish the affected area with a finer grit.
Common problems may also arise from environmental factors such as temperature fluctuations or inadequate maintenance of your tumbler. Regularly check and maintain your equipment to prevent issues. Keep your workspace clean and organized to avoid contamination and ensure consistent results. With proper care and attention, you can produce polished rocks that shine like gemstones.
Advanced Techniques and Projects for Experienced Rock Tumblers
As you’ve mastered the basics, it’s time to take your rock tumbling skills to the next level with complex projects that showcase your creativity and expertise. From precision polishing to intricate designs, the possibilities are endless!
Creating Custom Designs with Multiple Colors
Creating intricate designs with multiple colors requires patience and precision. As you’ve mastered basic tumbling techniques, it’s time to take your skills to the next level by experimenting with various color combinations. Start by selecting two or more gemstones that complement each other in terms of color, hardness, and size.
To create a striped pattern, for instance, simply alternate between two colors during the tumbling process. You can use a 30-minute alternating cycle with water and a gentle touch to achieve a subtle effect. For a more vibrant look, try combining three or four colors in an intricate design. This may involve multiple cycles, each with a different colored grit.
When working with multiple colors, it’s essential to maintain a consistent environment within your tumbler. Ensure the machine is clean and free of any debris that might affect the finish of your stones. With practice and experimentation, you’ll develop a keen eye for combining colors to achieve unique, one-of-a-kind designs. Remember, rock tumbling is all about pushing boundaries – don’t be afraid to try new things and adapt techniques to suit your creative vision.
Tips:
* Start with simple combinations (2-3 colors) and gradually experiment with more complex designs
* Pay attention to color gradations: mix subtle pastels for a soft look or bold brights for a striking effect
* Experiment with various grit sizes and types to achieve distinct textures and finishes
Experimenting with Different Materials
As you become more comfortable with rock tumbling, it’s exciting to start experimenting with different types of rocks, minerals, or materials. This is where the real fun begins! You can push the boundaries of what’s possible and discover new textures, colors, and patterns.
When selecting materials for your experiments, consider the following: hardness, density, and composition. For example, quartz crystals are relatively soft (7 on the Mohs scale) and would not hold a polish well, while agate is slightly harder (6.5-7) and can produce stunning results with the right technique.
To experiment with different materials, start by researching their properties and potential outcomes. You might discover that a particular rock type responds exceptionally well to a certain grit or polish. Don’t be afraid to mix and match materials or try out new techniques – it’s all part of the learning process!
Some great options for experimentation include:
• Combining two or more types of rocks in a single tumbler
• Using unusual materials like fossils, gemstones, or even glass
• Experimenting with different grit sequences or polishing compounds
Remember to always follow proper safety protocols and use your best judgment when working with new materials. With patience and practice, you’ll be creating stunning, one-of-a-kind pieces in no time!
Conclusion: Getting Started on Your Own Rock Tumbling Journey
As you’ve made it through this ultimate guide to rock tumbling, it’s time to put your newfound knowledge into action. Don’t let fear or intimidation hold you back from starting your own rock tumbling journey. Begin by investing in a basic rock tumbler kit, which can be found at most hobby stores or online. This kit will typically include everything you need to get started, such as grits, polish, and instructions.
Next, choose some rough rocks that you’re excited to work with and follow the manufacturer’s guidelines for tumbling them. Remember to start slow and not over-polish your rocks, as this can cause them to become too shiny or even break apart. With practice, patience, and persistence, you’ll be creating beautiful, smooth stones in no time.
Frequently Asked Questions
What should I do if my rock tumbled piece still has scratches or imperfections after multiple polishing cycles?
Don’t worry, it’s not uncommon for rocks to require additional attention to achieve the desired polish! If your rock still has scratches or imperfections, try checking your grit sequence and ensuring you’re using the right polish for the type of stone. You can also experiment with different polishing times or techniques, such as using a felt wheel or a vibrating lap. Remember to always follow safety precautions when working with power tools.
How often should I clean my rock tumbler and what’s the best way to maintain it?
Regular cleaning is essential for maintaining your rock tumbler’s performance and longevity. Clean your tumbler after each use by washing it with soap and water, and then drying it thoroughly. For more thorough maintenance, disassemble the machine every few months and clean its internal components. You can also oil moving parts to keep them running smoothly.
Can I use any rock for tumbling, or are there specific types that work better?
While you can tumble most types of rocks, some materials respond better than others due to their chemical composition and density. For example, quartz-based rocks like agate, jasper, and chalcedony tend to polish well, while harder stones like quartzite or basalt may require more aggressive grit sequences. Start with softer materials and experiment with different types to find what works best for you.
What’s the difference between using a rotary tumbler versus a vibratory one?
Both types of tumblers have their advantages! Rotary tumblers are better suited for larger rocks and can achieve faster polishing times, but they may not be as precise or gentle on softer stones. Vibratory tumblers, on the other hand, provide more consistent and controlled motion, making them ideal for delicate or precision work. Consider your specific needs and choose a tumbler that suits your rock tumbling goals.
Can I use a rock tumbler for polishing metal, like copper or bronze?
While traditional rock tumbling is designed for stones, some enthusiasts experiment with polishing metals using specialized equipment and techniques. However, it’s essential to note that metal tumbling requires specific safety precautions due to the risk of sparks and fire. If you’re interested in metal tumbling, research reputable resources and safety guidelines before attempting this advanced technique.