
Drawing birds in flight can be one of the most challenging yet rewarding subjects to capture on paper. The movement, proportions, and anatomy of flying birds require attention to detail and practice to get right. Many artists struggle to depict these delicate creatures in motion, but with a solid understanding of perspective, proportion, and movement, you can take your bird drawings to the next level.
In this comprehensive guide, we’ll explore expert tips on drawing birds in flight from all angles. Whether you’re interested in painting waterfowl gliding effortlessly across a serene lake or songbirds soaring through the forest canopy, our step-by-step approach will help you master the intricacies of bird anatomy and movement. With practice and patience, you can confidently draw these beautiful creatures with precision and accuracy, elevating your skills to new heights.
Understanding Bird Anatomy and Movement
To draw birds in flight convincingly, it’s essential to understand how their unique anatomy affects their movement patterns, from wing shape to tail feathers. Let’s explore this fascinating intersection of form and function together!
Observing Feather Structure and Patterns
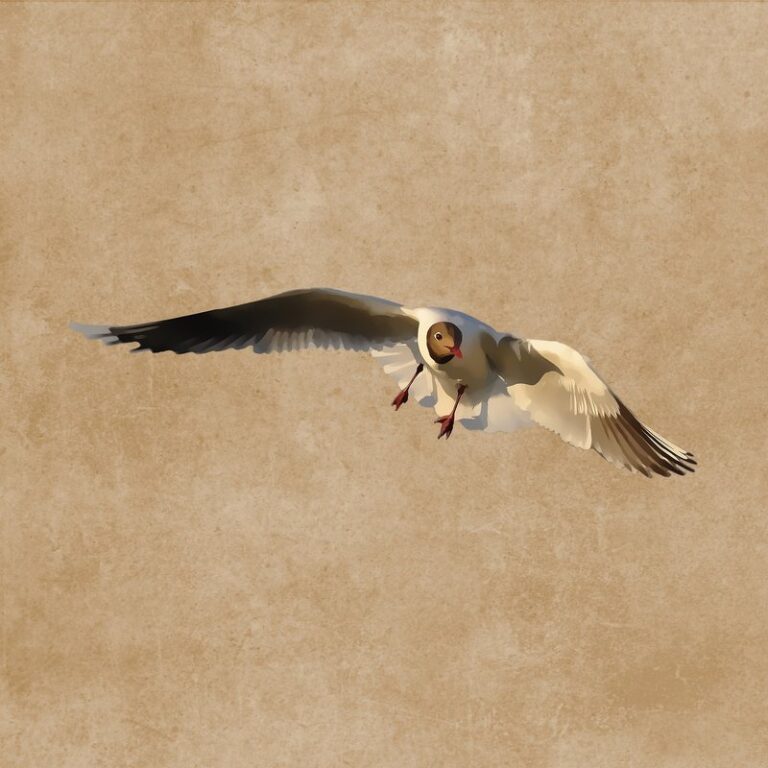
When observing feathers on birds in flight, you’ll notice they play a crucial role in their ability to glide and maneuver through the air. There are two primary types of feathers: contour feathers and down feathers. Contour feathers, which cover the body’s outer surface, provide lift and help control airflow around the bird. Their stiff rachises (central shafts) and vanes (barbs) create a smooth, streamlined shape that reduces drag.
Down feathers, on the other hand, trap warm air next to the bird’s skin, insulating it from the cold temperatures outside. This insulation is essential for birds’ survival in colder climates. By studying these two types of feathers, you can gain a better understanding of how they work together to enable flight.
To accurately draw a bird in motion, observe how its feathers are arranged and move with the wind. Note the way contour feathers overlap and tuck under each other, creating a layered effect that helps reduce drag during flight. Study the shape and size of the feathers on different parts of the body – wings, tail, and head – to ensure your drawing accurately captures their proportions and placement.
By paying attention to these details, you can create more realistic and convincing drawings of birds in flight. When sketching a bird’s feathers, remember that they’re not just static decorations; they play an active role in its ability to fly and maneuver through the air.
Recognizing Wing Movements and Actions
As you work on drawing birds in flight, it’s essential to grasp the various wing movements that occur during this dynamic process. The most common actions you’ll need to capture are flapping, gliding, and soaring.
Flapping involves a rapid, repetitive motion of the wings as the bird gains lift or navigates through dense air. To draw a bird in mid-flap, focus on capturing the tension in its wing muscles. Observe how the primary feathers appear stiffened, while the secondary feathers ripple with motion. Pay attention to the slight rotation of the wingtips and the way they slice through the air.
Gliding is characterized by an extended wing span, with the bird using aerodynamic forces to conserve energy. In a gliding pose, draw the wings held high, with a subtle curvature to indicate lift. Soaring, on the other hand, involves a slow, sweeping motion of the wings as the bird rides thermals or updrafts.
Understanding these movements will help you capture realistic poses and convey a sense of dynamism in your drawings.
Mastering Proportions and Perspective
Mastering proportions and perspective is crucial when drawing birds in flight, as it allows you to accurately capture their dynamic movement and three-dimensional form. Let’s dive into some essential tips for getting this right.
Establishing a Sense of Scale and Space
When drawing birds in flight, it’s essential to establish a sense of scale and space to create a convincing composition. This is where proportion comes into play – the relationship between the body, wings, and tail must be accurate to capture the bird’s movement and energy.
To achieve this, start by paying attention to the size and placement of the wings in relation to the body. A good rule of thumb is to imagine an invisible line running from the tip of the wing down to the body, roughly where the bird’s spine would be. This helps you gauge the correct angle and position of the wing.
Don’t forget about the tail, which should be proportionate to the rest of the bird’s structure. A small adjustment in tail length can greatly impact the overall sense of movement and fluidity. Practice observing birds in flight to get a better understanding of how their wings and tails interact with each other. By paying attention to these details, you’ll be able to create more dynamic and engaging drawings that capture the essence of your feathered subject.
Using Perspective to Depict Flight Dynamics
When drawing birds in flight, accurately depicting their dynamic movements is crucial to capturing their essence. To achieve this, artists must grasp the principles of perspective in art, particularly those related to conveying movement.
Perspective is often associated with creating a sense of depth and distance on a flat surface. However, when applied to depicting movement, it becomes an essential tool for capturing the fluidity and energy of birds in flight. Artists can use one-point perspective, where parallel lines converge at a single vanishing point, to create a sense of forward motion.
To convey the dynamic actions of birds, artists can also experiment with atmospheric perspective. This involves using lighter colors and softer brushstrokes to suggest depth and distance. For example, when drawing a bird in flight, an artist might use warm colors and bold strokes for the bird itself, while using cooler tones and softer textures for the surrounding atmosphere.
By applying these principles of perspective, artists can effectively convey the movement and energy of birds in flight, creating a captivating and dynamic piece of art.
Capturing Expressions and Emotions
When it comes to drawing birds in flight, capturing their expressions and emotions can be just as important as accurately rendering their poses. We’ll explore how to convey a sense of movement and feeling in your artwork.
Portraying Bird Facial Expressions
When drawing birds in flight, it’s essential to capture their facial expressions, which can convey emotions like concentration, excitement, and even fear. Observe the way a bird’s eyes are focused on the horizon, its beak slightly open as if taking in every detail. This is a classic expression of concentration, a state that many birds enter when navigating through challenging airspace.
To capture this expression, try drawing the bird with its eyes slightly narrowed, focusing on the subtle details of its facial features. Experiment with different lines and textures to convey a sense of tension or alertness. For example, you can add short, jagged lines around the beak to suggest a bird’s intense focus on finding food or escaping predators.
On the other hand, a bird in flight might display an expression of excitement, such as during courtship displays or when chasing after prey. Look for birds with their eyes wide open, beaks spread apart, and feathers ruffled in the wind. To capture this energy, use loose, expressive brushstrokes and bold lines to convey a sense of dynamism and movement.
Remember, the key is to observe and translate what you see into your artwork. Study the behavior and body language of birds in flight, and let their unique expressions guide your drawing technique. With practice and patience, you’ll become more skilled at capturing the captivating emotions of birds as they take to the skies.
Conveying Energy and Movement with Lines and Strokes
When capturing birds in flight, conveying energy and movement is crucial to creating a dynamic drawing. Artists can achieve this by employing expressive lines and strokes that evoke a sense of dynamism.
To begin with, vary the weight and texture of your lines to indicate speed and turbulence. Thicker, more textured lines can suggest powerful wingbeats or turbulent air currents, while thinner lines may imply smoother gliding motion. For instance, when drawing a bird emerging from a dive, use bold, expressive strokes to convey its rapid acceleration.
Another technique is to experiment with different line directions and angles to capture the fluidity of flight. Follow the shape and contours of the body as it curves through the air, using lines that flow smoothly yet confidently. By doing so, you’ll create an illusion of movement that draws the viewer’s eye along the bird’s trajectory.
As you practice this approach, pay attention to how varying line weights and directions affect the overall energy of your drawing.
Tips for Drawing Different Bird Species
Drawing different bird species requires a keen eye for detail and practice. In this next section, we’ll share some expert tips to help you capture the unique characteristics of various birds in your artwork.
Recognizing and Drawing Waterfowl, Songbirds, and Birds of Prey
When it comes to drawing birds in flight, understanding the unique characteristics of different species is essential. Waterfowl, songbirds, and birds of prey are popular subjects for artists due to their diverse habits and behaviors. For instance, waterfowl like ducks and geese have a distinctive waddling gait on land but become sleek and streamlined when they hit the water. To capture this, focus on elongating the neck and body while broadening the tail.
Songbirds, such as sparrows and finches, are known for their agility in flight. Observe how they rapidly beat their wings to maintain speed and maneuverability. Draw them with a loose, expressive line to convey this energy. Don’t forget to capture the subtle shapes of their feathers and the texture of their bodies.
Birds of prey like hawks and eagles possess incredible power and precision. Study their sharp talons and hooked beaks, which indicate their hunting prowess. When drawing these birds in flight, focus on conveying their speed and agility through dynamic lines and bold shapes.
Emphasizing Key Features for Each Group
When drawing birds in flight, it’s essential to emphasize the distinctive features of different bird groups. Take waterfowl, for instance – ducks and geese have a sturdy body build and webbed feet, which should be depicted with clear lines and textured feathers. Songbirds, on the other hand, like sparrows and finches, are characterized by their sleek bodies and long, pointed wings.
To capture these traits in your drawing, focus on using smooth lines for songbird shapes and softening the feather texture to convey a more aerodynamic appearance. In contrast, birds of prey – hawks and eagles – exude power and sharpness. Their broad wings and hooked beaks should be rendered with bold strokes and defined edges.
When illustrating these groups in flight, consider the unique behaviors associated with each group as well. For example, songbirds often fly in flocks, so capture their movement by using loose brushstrokes or scribbled lines to suggest a sense of fluidity and interaction among the birds.
Common Mistakes to Avoid
When drawing birds in flight, it’s easy to get caught up in the excitement and overlook some crucial details that can make all the difference in capturing their dynamic movement. Let’s explore common mistakes to avoid when rendering flying birds.
Overemphasis on Details at the Expense of Movement
When attempting to draw birds in flight, many artists get caught up in meticulously rendering every detail, from individual feathers to beaks. While accuracy is essential, an overemphasis on details can lead to static and lifeless depictions. Birds in motion are characterized by fluid movement, so it’s crucial to capture this action in your art.
To achieve a sense of dynamism, focus on conveying the bird’s energy through loose, expressive strokes rather than intricate details. This doesn’t mean sacrificing accuracy entirely; instead, aim for a balance between realism and movement. Pay attention to the way feathers blur around the edges as the bird flies, or how its wings seem to ripple in motion.
Consider the work of wildlife artist Robert Bateman, who masterfully captures birds in flight with loose, expressive brushstrokes that convey a sense of energy and movement. By adopting this approach, you can create more engaging and dynamic depictions of birds in flight, bringing them to life on the page.
Forgetting Perspective and Proportion
When drawing birds in flight, it’s easy to get caught up in the excitement of capturing their dynamic movement and forget about two crucial aspects: perspective and proportion. However, neglecting these fundamentals can result in inaccurate depictions that don’t reflect the bird’s true form.
Perspective is essential for conveying a sense of depth and distance in your drawing. When drawing birds in flight, it’s easy to place wings or tail feathers at the same level as the body, creating a flat, two-dimensional appearance. Instead, use one-point perspective to create a vanishing point behind the bird, making its form recede into space.
Proportion is also critical when drawing birds, especially those with large wingspans or long tails. Measure your subject carefully and make sure to capture its overall shape accurately. A good rule of thumb is to use reference images or real-life observations to get a sense of the bird’s proportions before starting your drawing.
Conclusion: Practicing and Refining Your Skills
Now that you’ve mastered the basics of drawing birds in flight, it’s time to put your skills into practice and refine them through consistent effort and dedicated practice.
Setting Up a Still-Life Setup or Reference Images
Practicing drawing birds in flight can be challenging, but setting up a still-life setup or using reference images can greatly aid in refining your skills. By doing so, you’ll gain a deeper understanding of bird anatomy and movement, enabling you to capture their dynamic poses more accurately.
To set up a still-life setup, start by gathering a variety of materials such as paper, pencils, erasers, and any other drawing tools you prefer. Choose a pose that showcases the bird’s unique characteristics, such as its wingspan or tail feathers. This will help you develop a sense of proportion and understanding of how the different parts of the body work together.
For example, observing the way a falcon’s wings curve downward when in mid-flight can aid in accurately depicting this movement. Similarly, using reference images can provide valuable insights into bird behavior and anatomy, allowing you to study specific features such as wing shape or beak structure.
When selecting reference images, look for high-quality photographs or drawings of birds in flight that demonstrate a range of poses and movements. You may also find it helpful to create your own still-life setup using taxidermy specimens or live models – just be sure to follow local laws and regulations when working with live animals.
Continuously Observing and Studying Bird Behavior
Observing bird behavior is essential for capturing their essence on paper. To improve your drawing and painting skills, it’s crucial to continuously observe and study the flight patterns, postures, and habits of various bird species. This knowledge will enable you to accurately depict the dynamic movements and textures of feathers.
Start by observing birds in their natural habitats, either through personal visits or by watching documentaries and videos. Take note of how they fly, perch, and interact with each other. Pay attention to the subtle details such as wing shapes, tail positions, and head orientations. You can also study photographs and illustrations from various sources like field guides, museums, and online archives.
To further enhance your knowledge, consider consulting bird behavior experts or joining local bird-watching groups to learn more about specific species and their habits. Some popular resources include the Cornell Lab of Ornithology’s All About Birds website and the Audubon Society’s online library. By immersing yourself in this wealth of information, you’ll be able to draw birds with increased accuracy and authenticity, capturing their essence on paper like never before.
Frequently Asked Questions
How can I apply the lessons learned from drawing birds in flight to other subjects, such as abstract art or still-life compositions?
Applying the principles of movement, proportion, and perspective learned from drawing birds in flight can be a game-changer for your artistic practice. Focus on capturing energy and motion in your subjects, even if they’re not moving. Experiment with unconventional techniques, like dynamic line work or expressive brushstrokes, to convey a sense of dynamism. This will help you develop a more nuanced understanding of visual flow and composition.
What are some common mistakes beginners make when drawing birds in flight, and how can I avoid them?
Yes, forgetting perspective and proportion is one of the most common mistakes artists make when drawing birds in flight. To avoid this, double-check your measurements and reference images frequently. Don’t be afraid to simplify complex forms or break down a scene into manageable parts. Practice observing bird behavior and studying photographs of birds in various poses.
How can I effectively depict the emotions and expressions on a bird’s face while still conveying its movement?
Capturing the emotional intensity of a bird’s expression is crucial to drawing it convincingly. Pay attention to the shape and positioning of the beak, eyes, and head. Observe how these features are affected by the bird’s mood, environment, and posture. Experiment with subtle variations in facial anatomy to convey different emotions.
What are some tips for incorporating movement into my drawings without making them look stiff or unnatural?
Movement is all about energy, so don’t be afraid to experiment with loose, expressive lines and gestures. Use dynamic shapes and forms to capture the flow of a bird’s movement, rather than just its static position. Observe how feathers interact with air resistance, creating subtle curves and arcs that reflect motion.
Can I use digital drawing tools or software to practice drawing birds in flight?
Yes, many artists successfully use digital drawing tools to practice their skills, including drawing birds in flight. Choose software that allows for a wide range of brushstrokes and textures, such as Procreate or Corel Painter. Practice with digital reference images and observe how different programs handle line work and texture.