
Drawing butterflies can be a delightful way to express your creativity, and with practice, you’ll be able to create beautiful and lifelike artwork. However, for many people, drawing a butterfly seems like an intimidating task. The intricate patterns on its wings and delicate body shape can be overwhelming, leading to frustration and disappointment.
In this comprehensive guide, we’ll break down the process of drawing a butterfly into manageable steps, making it easy to follow along and achieve impressive results. We’ll cover the basics of the body shape and wingspan, as well as explore various color patterns and techniques to give your butterfly some personality. By the end of this article, you’ll have the skills and confidence to draw a stunning butterfly with ease, bringing your imagination to life on paper.
Understanding Butterfly Basics
To get started, let’s take a closer look at the basic shape and structure of butterflies, including their wings and body proportions. This will help you draw a more realistic butterfly from the very beginning.
Recognizing Key Features
When drawing a butterfly, it’s essential to capture its unique characteristics. Let’s start with the body shape: butterflies have slender bodies, usually long and narrow, with six legs that are often tucked away from view. The thorax (the main part of the body) is typically broadest at the base of the wings.
Notice how a butterfly’s wingspan is longer than its body? This is because the wings make up about two-thirds of the overall length of the insect. A typical adult butterfly wing span can range anywhere from 2 to 5 inches (5-13 cm), with some species having even larger or smaller wingspans.
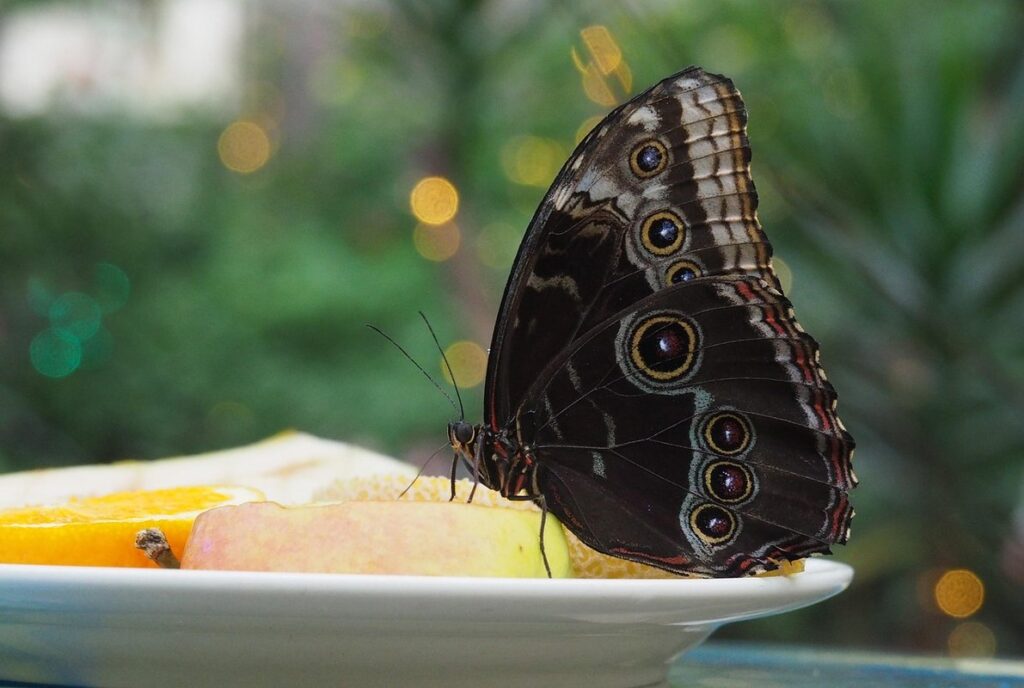
Colors and patterns on a butterfly’s wings are also vital features that set them apart. With over 20,000 known species, you’ll encounter an incredible variety of colors – from iridescent blues and greens to vibrant oranges, yellows, and reds. Look for characteristic color patterns like stripes, spots, or even eyespots, which can be small dots surrounded by dark rings.
By paying attention to these details, you’ll create a more accurate and visually appealing butterfly in your drawing.
Familiarizing with Basic Shapes
When it comes to drawing a butterfly, understanding basic shapes is key to creating a beautiful and symmetrical design. Let’s start with the foundation: circles. Yes, you read that right – circles! Circles are used to draw the head, body, and wing tips of our beloved butterfly.
But why circles? Well, they provide an effortless way to create smooth curves and shapes, making it easier for beginners to get started. To draw a circle, simply hold your pencil or pen at a comfortable angle and gently move it in a circular motion. Practice makes perfect, so take some time to get familiar with drawing circles.
Now that you’re comfortable with circles, let’s combine them to form the overall structure of our butterfly. The head is usually drawn as a small circle, while the body is slightly larger. Wing tips are also circles, but they can be smaller or larger depending on your desired design. By using these basic shapes, you’ll be able to create a sturdy and balanced foundation for your butterfly.
Preparing Your Drawing Tools and Space
Before we dive into drawing your butterfly, make sure you have all the necessary tools and a clean workspace to help bring your design to life. Gather pencils, paper, and eraser now!
Choosing the Right Paper
When it comes to drawing a butterfly, choosing the right paper is just as important as selecting the right pencil. The texture, size, and weight of your paper can greatly impact the overall look and feel of your artwork.
For beginners, it’s best to start with a smooth, medium-weight paper that allows for easy blending and shading. Look for papers labeled as “hot press” or “smooth finish,” which are ideal for detailed work. A good option is cartridge paper, available in various sizes, from A4 to larger formats. This type of paper is versatile and suitable for beginners who want to experiment with different techniques.
For professionals, you may prefer a heavier weight paper that can handle multiple layers of pencil work without buckling. Look for papers labeled as “cold press” or “textured finish,” which offer a more expressive surface for creating intricate details. Vellum paper is another great option, known for its smoothness and durability.
Ultimately, the right paper will make your drawing experience easier and more enjoyable. Consider investing in a set of papers with different textures and weights to experiment with and find what works best for you.
Gathering Essential Supplies
To start drawing a beautiful butterfly, you’ll need to gather some essential supplies. This includes a variety of pencils that will help you achieve the desired level of detail and shading. You’ll want to have an HB pencil for general drawing, a 2B pencil for darker lines and details, and a 4B pencil for creating deep shadows.
In addition to these pencils, make sure you have a reliable eraser on hand. This is crucial for correcting any mistakes or smudges that may occur during the drawing process. A good sharpener will also come in handy for keeping your pencils in top condition.
If you want to add some color to your butterfly, consider investing in markers or colored pencils. These can be used to create a range of different shades and hues, adding depth and dimension to your drawing. Some popular options include Copic markers, Prismacolor pencils, and Faber-Castell Polychromos pencils.
Having these supplies within reach will make the drawing process much more enjoyable and help you achieve the best results possible.
Sketching the Butterfly’s Body
Now that we’ve covered the wings, it’s time to focus on sketching the butterfly’s body, which is relatively simple and involves just a few key shapes. You’ll find that this part comes together quickly!
Drawing the Head and Thorax
Drawing the head and thorax area of a butterfly can be a bit tricky, but don’t worry, we’ll break it down into simple steps. The head and thorax make up the front part of the butterfly’s body, and they’re connected by a small neck.
Start by sketching two oval shapes for the head and thorax. Make sure to leave a small gap in between them to create a neck. The head should be slightly larger than the thorax. Think of it as an upside-down egg shape with a rounded top.
Pay attention to proportions: the head is usually about one-third the size of the thorax. Now, let’s add some details like antennae. These are long, thin structures that stick out from the head on either side. You can draw them as simple lines or add some detail by making them slightly thicker towards the base.
Remember, the key to drawing a realistic butterfly is in the proportions and details. Practice sketching these areas several times until you feel comfortable with the shapes and features.
Adding the Abdomen and Legs
Now that you’ve drawn the butterfly’s thorax and wings, it’s time to add some life to its body with the abdomen and legs. To ensure accuracy, let’s start by observing the proportions of a real butterfly’s body. Typically, the abdomen is about one-third of the total length of the body.
When drawing the abdomen, remember that it’s usually teardrop-shaped, tapering towards the rear. You can achieve this shape by gently curving the lines on either side of the thorax, making sure to keep them smooth and even. Pay attention to the placement – the abdomen should be situated just below the wings, slightly offset from the center.
The legs are also essential for a realistic butterfly drawing. Most butterflies have four slender legs that arise from the bottom of the thorax. To draw these accurately, focus on their length and proportions in relation to the body. The hind legs are usually the longest, while the front legs are shorter but still prominent. Use gentle lines to suggest the texture and movement of the legs, and remember to keep them evenly spaced around the abdomen.
Creating Beautiful Wings
Now that we’ve drawn the butterfly’s body and head, let’s focus on creating its beautiful wings, which will bring our lovely creature to life. We’ll add delicate veins and patterns to make it pop!
Basic Wing Structure
When drawing a butterfly, it’s essential to get the basic wing structure right. This will set the foundation for a beautiful and realistic design. The wingspan of a butterfly typically ranges from 2 to 12 inches (5-30 cm), depending on the species.
Observe how the shape of the wings contributes to their overall appearance. Butterfly wings are usually rounded at the tips, with a smooth curve that tapers towards the body. This shape allows for maximum lift and maneuverability in flight.
The veins on a butterfly’s wing play a crucial role in its structure and beauty. These fine lines provide support to the delicate membrane of the wing and help distribute stress evenly. In most species, you’ll notice that the veins are more prominent near the base of the wing, gradually fading towards the tip.
To draw realistic wings, focus on replicating these key elements. Start by sketching a rough outline of the wingspan, then add the rounded tips and smooth curves. Don’t forget to include the veins – you can use a fine-tip pen or pencil to create them. Practice drawing different wing shapes and vein patterns to develop your skills and create more realistic butterfly designs.
Adding Patterns and Details
Now that you have a beautiful butterfly body, it’s time to add some personality with patterns and details. Patterns like spots, stripes, or even color gradients can make each wing unique. To achieve this, use small, circular shapes for spots and fill them in with the corresponding color. Stripes can be added using long, thin lines that follow the natural shape of the wings.
For a more realistic look, create veins by drawing short, curved lines within the wings. These lines should start from the body and extend towards the edges of the wings. To add edges to your butterfly’s wings, draw a series of small curves or straight lines around the edges, making sure they’re spaced evenly apart.
When working with patterns, remember that it’s all about balance. Don’t overcrowd the wings with too many details – leave some space for the eyes to focus on the overall design. Experiment with different patterns and combinations to create a one-of-a-kind butterfly.
Adding Color and Shading Techniques
Now that you’ve mastered the basic shapes, let’s add some personality to your butterfly by learning simple color and shading techniques to bring it to life.
Introduction to Color Theory
When it comes to drawing a butterfly, color plays a crucial role in bringing this beautiful creature to life. But before we dive into adding colors to our butterfly, let’s cover some fundamental principles of color theory that will help us create a stunning and realistic design.
You see, when it comes to color, there are three main components: hue, saturation, and value. Hue refers to the actual color itself, such as blue or red. Saturation is how bright or vibrant the color appears, while value refers to the lightness or darkness of the color. Think of it like a seesaw – if you increase one aspect, the other will decrease.
Now, let’s talk about the color wheel! This circular diagram shows how colors are related and can help us create harmonious combinations. For drawing butterflies, we’ll focus on warm colors like oranges, yellows, and reds for the wings, as they evoke a sense of energy and life. Remember, the key to creating stunning colors is to balance your hues with varying degrees of saturation and value. For example, if you want a butterfly’s wings to appear bright and vibrant, choose a saturated color. But if you want them to appear soft and muted, opt for a desaturated one. By mastering these basic principles, you’ll be well on your way to creating a breathtakingly beautiful butterfly!
Applying Color and Shading
Now that you’ve mastered the basics of drawing a butterfly’s shape and body, it’s time to add some color and life to your artwork. Applying color and shading techniques can make all the difference between a simple sketch and a stunning piece of art.
Let’s start with the colors! Butterflies are known for their vibrant wings, so we’ll focus on applying colors to these beautiful parts first. Use a paintbrush or colored pencils to block in large areas of color on each wing, following the natural shape and curves of the butterfly’s body. For example, you can use yellow or orange on one side and blue or purple on the other.
Next, let’s talk about shading techniques. Hatching is a great way to add depth and dimension to your artwork. Simply draw parallel lines that follow the contours of the butterfly’s wings and body using a range of line weights. For more detailed shading, try cross-hatching by layering multiple sets of hatching lines at different angles. Experiment with both techniques on different parts of the butterfly to create a sense of texture and dimensionality.
Remember, practice makes perfect, so don’t be afraid to experiment with different color combinations and shading techniques until you find what works best for your artwork. With these simple steps, you’ll be adding color and life to your butterfly drawing in no time!
Refining Your Drawing Skills
Now that you have a basic butterfly shape, let’s refine your drawing skills by adding details and textures to create a more realistic and beautiful design. This will make all the difference in making your butterfly look stunning!
Tips for Realism and Expressiveness
When it comes to drawing a butterfly, achieving a realistic or expressive look can make all the difference. Texture is one of the key elements to focus on for realism. Think about the intricate patterns and veins on a butterfly’s wings – these are not just random swirls, but rather a unique combination of ridges, bumps, and smooth areas. To capture this texture, try using a range of pencil marks, from gentle hatching to bold cross-hatching.
Blending is also essential for creating an expressive look. When drawing the delicate colors on a butterfly’s wings, avoid sharp lines or harsh transitions between shades. Instead, use soft blending stumps or tortillons to merge colors and create subtle gradations. This will give your butterfly a more lifelike appearance.
Subtlety is also crucial when aiming for expressiveness. Avoid over-exaggerating features or using overly bright colors – this can make your drawing look cartoonish rather than realistic. Instead, focus on capturing the gentle nuances of a butterfly’s shape and color. For example, observe how the delicate curves of a butterfly’s body are not sharp or angular, but rather smooth and rounded.
Common Mistakes to Avoid
When drawing a butterfly for the first time, it’s easy to make mistakes that detract from the overall appearance. One common error is drawing the wings too symmetrical. Butterflies have unique patterns and shapes on each wing, so strive for asymmetry instead.
Another mistake is not leaving enough space between the body and wings. Remember, a butterfly’s wings are meant to be proportional to its body, but not touching it. This requires some practice to get right, but pay attention to the spacing of your wings as you work through this guide.
Don’t forget that butterflies have veins in their wings too! These can easily be overlooked or drawn incorrectly. Take your time and study the shape and pattern of these veins on a real-life butterfly before attempting to draw them yourself.
Finishing Touches and Displaying Your Artwork
Now that you’ve completed your butterfly drawing, it’s time to add some final details and proudly display your artwork. We’ll walk you through adding colors and a background.
Final Touches and Edges
When drawing a butterfly, it’s easy to get caught up in the intricate details of its wings and forget about something equally important: edges. Edges are what set your butterfly apart from a mere shape, giving it depth, dimension, and visual interest.
But did you know that poorly defined or overdone edges can detract from the overall effect? In fact, a soft, subtle edge can create a sense of movement and fluidity, while a harsh one can make the artwork look stiff and unyielding. To achieve a balance, try using a technique called “feathering” to refine your edges.
Feathering involves gradually decreasing the line weight as you move away from the subject, creating a soft, gradual transition between shapes. This is especially useful when drawing the delicate wings of a butterfly. Simply hold your pencil at a shallow angle and gently blend the lines, feathering out towards the edges. Practice this technique on simple shapes before applying it to your butterfly artwork. With practice, you’ll be able to create subtle, nuanced edges that add depth and dimension to your drawings.
Displaying and Sharing Your Work
When you’ve finally finished drawing that beautiful butterfly, it’s time to showcase your artwork. Proper display and sharing of your piece can make all the difference in its visual appeal and overall impact.
You have several options when it comes to framing your artwork. Consider using a wooden or metal frame with a matte to enhance the colors and details of your drawing. Online retailers like Etsy or Amazon offer a wide range of frames that cater to different tastes and styles. Alternatively, you can also opt for a digital presentation format such as a high-resolution image saved in JPEG or PNG format. This way, you can easily share it on social media platforms, send it via email, or upload it to your website.
Online sharing platforms like Instagram, DeviantArt, or Pinterest are great ways to showcase your artwork and connect with other artists. You can also use online marketplaces like Redbubble or Society6 to sell prints of your butterfly drawing. By displaying your artwork in a professional manner, you’ll not only preserve its beauty but also inspire others to create their own unique pieces.
Frequently Asked Questions
What if I struggle with drawing realistic wings, should I focus on patterns or shape first?
When struggling to draw realistic wings, start by focusing on the overall wing shape rather than individual scales or veins. Practice drawing simple shapes that capture the movement and flow of the wings, then gradually add more details.
Can I use digital tools instead of traditional drawing methods, and what are some recommendations?
Yes, you can use digital tools to create a butterfly artwork, such as Adobe Illustrator or Procreate. When choosing a digital tool, consider its ease of use, customization options, and compatibility with your device.
How do I achieve the right proportions for my butterfly’s body and wings in relation to each other?
Pay attention to the illustrations provided in this guide and practice drawing butterflies from various angles. Use simple measurements like “body length is half of the wing span” as a starting point, then adjust according to individual observation.
What if I’m new to drawing or don’t have artistic experience – can I still draw a beautiful butterfly?
Absolutely! This article aims to break down the process into manageable steps. Even with no prior experience, by following each step carefully and practicing patience, you’ll be able to create a stunning butterfly artwork that showcases your unique perspective.
How do I balance adding color and shading techniques without overloading my drawing with too many details?
Remember, less can often be more when it comes to details in drawing. Practice striking a balance between capturing the overall shape, movement, and textures of your butterfly’s wings, body, or other features before focusing on detailed coloring and shading.