
Drawing insects can be a fascinating and rewarding experience for anyone who’s ever been captivated by their intricate details. From the delicate patterns on a butterfly’s wings to the robust exoskeletons of beetles, these tiny creatures offer endless inspiration for artists and enthusiasts alike. However, drawing insects requires more than just a keen eye – it demands an understanding of anatomy, techniques, and practice to get those details right.
As you learn to draw insects, you’ll discover how their unique characteristics can be captured with various mediums, from pencils to paints. This comprehensive guide will take you through the basics of insect anatomy, essential drawing techniques, and valuable tips for improvement. You’ll also find practical advice on how to practice effectively, helping you unlock your creative potential and bring these tiny wonders to life on paper. By the end of this article, you’ll have the skills and confidence to draw a wide range of insects with precision and accuracy.
Understanding Insect Anatomy
Let’s take a closer look at the intricate details that make up an insect’s body, starting from their head to their legs and everything in between. This will help you get a better understanding of their proportions and features.
Essential Body Parts
When drawing insects, it’s essential to understand their basic body parts. The head, thorax, abdomen, and wings are the fundamental components that make up an insect’s anatomy.
Start with the head: notice its shape, size, and proportion to the rest of the body. Insects have three main eyes (compound, simple, or both), antennae for sensory input, and a mouthpart (proboscis) for feeding. A diagram will help you identify these features accurately.
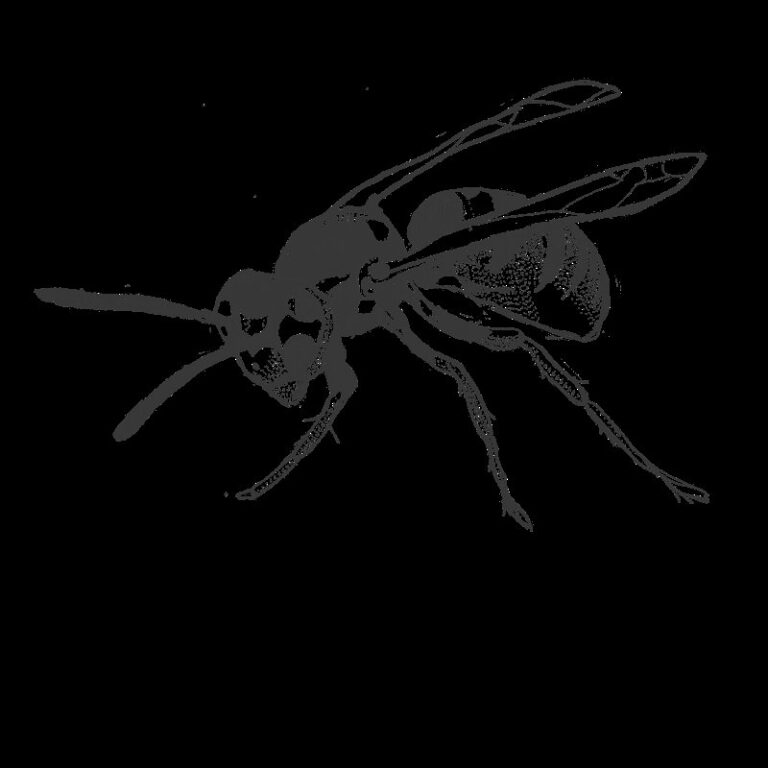
Next is the thorax – the middle segment that houses the insect’s legs and wings. The number of legs varies among insects: six in beetles, eight in flies, or four in butterflies. Observe how the thorax supports and connects to the abdomen, which typically contains digestive organs and reproductive systems.
Wings come in different forms: delicate and veined (butterflies), robust and membranous (beetles), or absent altogether (ants). Study the wing structure by examining reference images. Notice how wings attach to the thorax and flap during movement. Understanding these fundamental body parts will help you draw more realistic insects, starting with accurate proportions and anatomy.
Recognizing Different Types of Insects
Insects can be broadly categorized into six main groups: beetles, bees and wasps, butterflies and moths, ants, flies, and cicadas. Each of these categories has distinct features that set them apart from one another. For example, beetles have a hard outer shell called an elytra, while bees and wasps have hairy bodies and narrow waists. Butterflies and moths are characterized by their colorful wings and long, thin antennae. Ants have large heads with prominent mandibles and slender bodies.
To accurately draw different types of insects, it’s essential to understand these distinct features. For instance, when drawing a bee, you’ll want to capture the rounded shape of its body and the hairy texture of its legs. A butterfly’s wings should be depicted as delicate and feathery, with veins that give them structure.
Here are some key characteristics to keep in mind for each category:
- Beetles: hard outer shell, often brightly colored
- Bees and wasps: hairy bodies, narrow waists
- Butterflies and moths: colorful wings, long antennae
- Ants: large heads with prominent mandibles, slender bodies
Basic Drawing Techniques
To get started, let’s cover some essential drawing techniques that will help you accurately capture the intricate details of insects. These fundamental skills form the foundation for creating realistic and engaging insect art.
Pencils, Pens, and Paper Choices
When drawing insects, it’s essential to choose the right tools for the job. For pencils, a range of graphite options can be useful, including HB, 2B, and 6B grades. These different hardness levels allow you to achieve varying degrees of detail and shading. Colored pencils are also an excellent choice for adding subtle color to your drawings.
When it comes to pens, fine liners (0.1mm or 0.3mm tips) are ideal for creating detailed insect features like eyes and antennae. Brush pens can be used for softer, more expressive lines, but may require some practice to master. Consider investing in a set of fine liners with different tip sizes for versatility.
Paper choice is also crucial. Smooth paper (80-100gsm) works well for graphite drawings and fine liners, as it allows for smooth lines and minimal bleed-through. Textured paper can add an interesting element to your drawings, especially when using colored pencils or markers. Look for paper with a subtle texture that won’t overpower the details of your insect drawing.
In general, choose tools that feel comfortable in your hand and suit your personal style. Experimenting with different combinations will help you develop a workflow that works best for you.
Simple Gesture Drawing Exercises
Developing fine motor skills and getting comfortable with basic shapes, lines, and proportions is crucial for drawing insects. To start, try simple gesture drawing exercises that focus on capturing movement and energy rather than precise details.
Begin by holding a pencil or pen loosely and letting it move across the paper in smooth, flowing motions. Draw long, curved lines that follow the contours of your body or an imaginary insect. For example, draw a gentle curve for the neck of a butterfly or a sinuous line for the body of a grasshopper.
Next, practice drawing basic shapes: circles, ovals, and rectangles. Use these shapes to create simple insect forms, like a rounded egg-shaped body or a long, narrow thorax. Focus on proportions rather than precise measurements – remember that insects come in all shapes and sizes!
To add some variety, try drawing with different materials, such as charcoal or pastels. Experiment with gesture drawing exercises using different speeds and pressures to create expressive lines. This will help you develop your hand-eye coordination and get comfortable with the physical act of drawing.
Drawing Insect Body Parts
Now that you’ve mastered drawing insect heads and thoraxes, it’s time to move on to crafting the rest of their bodies, including delicate wings and legs. We’ll take a closer look at these intricate details next.
Heads and Faces
Insect heads come in a variety of shapes and sizes. For example, bees have distinctive black and yellow stripes on their faces, while butterflies often feature large, compound eyes and thin antennae. When drawing insect faces, focus on capturing the overall shape and proportions rather than getting bogged down in details.
Start by sketching out the general shape of the head, including the width and placement of the eyes. Insects typically have two large eyes that are close together, with smaller secondary eyes (called ocelli) situated above them. Note the angle and curvature of the antennae, as these can greatly affect the overall expression of the insect.
Consider the mouthparts as well – some insects, like bees and wasps, have a distinctive proboscis or tongue that they use to feed on nectar. Butterflies, on the other hand, tend to have shorter, more delicate mouthparts. When drawing these features, aim for accuracy rather than trying to include every detail.
A few key things to keep in mind when drawing insect faces: the eyes are often quite large and prominent, so don’t be afraid to make them a focal point; the antennae can add a lot of character to an insect’s face; and the mouthparts should reflect the insect’s feeding habits.
Thorax and Abdomen Details
When drawing the thorax and abdomen in insects, it’s essential to consider their specific features. The thorax is typically divided into three segments: prothorax, mesothorax, and metathorax. Observe how each segment supports a pair of wings or legs, depending on the insect’s type. Note that some insects, like bees, have specialized leg structures for collecting pollen.
Look closely at the wing attachments; they can be directly connected to the thorax or attached via tiny hooks. This detail is crucial for creating an accurate representation of your subject. The abdomen, which houses vital organs such as reproductive structures and digestive systems, varies in shape and size among different insects. For example, beetles have a narrow, elongated abdomen, while flies have a more rounded one.
Consider the number of legs on each segment; some insects have six, while others have eight or even ten. These variations can significantly impact the overall proportions of your drawing. Pay attention to how these features contribute to the insect’s posture and movement. In some cases, the thorax and abdomen may appear fused together, so it’s essential to capture this subtle detail accurately.
Advanced Insect Anatomy
As you continue to hone your insect-drawing skills, let’s take a closer look at the intricate details of their anatomy, starting with advanced features like compound eyes and intricate wing patterns. These complexities will elevate your drawings from basic representations to stunning works of art.
Wing Structure and Movement
Insect wings are a marvel of engineering, with different species developing unique structures to suit their flight styles. Butterflies and moths have delicate, almost transparent wings with distinctive veins, while bees and wasps boast stout, membranous wings with a network of tiny scales.
One key characteristic of insect wings is the presence or absence of a visible wing vein. In butterflies, these veins form a network that helps to distribute stress during flight, allowing for more efficient gliding and maneuverability. Bees and wasps, on the other hand, have a single main vein that runs along the length of their wings.
When drawing insect wings, pay close attention to these differences in structure. To capture the delicate appearance of butterfly wings, use gentle hatching strokes and emphasize the subtle curve of the veins. For more robust insects like bees and wasps, opt for thicker lines and a more textured approach to convey the strength and durability of their wings.
Some common wing types include:
- Hinge-winged insects (e.g., beetles), which have a distinct hinge connecting each half of their wings
- Folded-wing insects (e.g., butterflies), where the wings fold back along the body when at rest
- Stuttering-wing insects (e.g., bees and wasps), characterized by rapid, fluttering motion during flight
Additional Features (Legs, Claws, etc.)
Insect legs vary greatly in shape and size depending on their function. For example, beetles have sturdy hind legs adapted for jumping, while flies have delicate front legs perfect for walking on water. Claws are also a common feature among insects, serving as attachments for sensory organs or aiding in grasping food. Some insects, like ants, have highly specialized claws that enable them to climb smooth surfaces.
When drawing insect legs and claws, it’s essential to observe their proportions and texture. Note how the joints of the legs are often slightly thicker than the rest of the limb. This is because they provide flexibility and support during movement. Claws can be depicted as small, hook-like protrusions at the end of each foot or as more prominent, spatula-shaped extensions.
When drawing sensory organs, such as antennae or sensory hairs, consider their placement on the body. Antennae are often long and slender, while sensory hairs are shorter and more stiff. The shape and length of these features can give clues about an insect’s behavior and habitat. For example, a butterfly with long, thin antennae might be a migratory species.
Specialized Drawing Techniques
To master the art of drawing insects, it’s essential to learn specialized techniques that capture their intricate details and unique characteristics. This is where shading and texture come into play.
Color and Shading for Realism
To create realistic textures and patterns on insects, consider the unique characteristics of each species. For example, beetle elytra often display a metallic sheen due to microscopic scales that reflect light. To mimic this effect, use a mixture of gentle hatching with a sharp, fine-tip pen or a small brush to suggest the presence of these tiny scales.
When shading insect bodies, remember that some areas are more prone to shadowing than others. For instance, the thorax and abdomen tend to receive more direct light due to their rounded shape, while the wings and legs often remain in partial shade. Use this knowledge to create a sense of depth and dimension on your drawings.
Pay attention to the subtle patterns found on insects’ bodies, such as the intricate veins on butterfly wings or the fine hairs on an ant’s body. These details can be achieved using a range of techniques, including cross-hatching, stippling, and hatching with varying line weights.
Portraiture and Expression in Insect Drawings
When drawing insect portraits, the goal is to capture more than just a likeness – you want to convey emotions and personalities. To achieve this, focus on key characteristics like eyes, facial expressions, and posture.
Eyes are crucial in conveying expression, as they can be shaped into various forms to indicate mood or alertness. A beetle’s large, rounded eyes might give it an endearing appearance, while a spider’s more angular eyes could suggest a sense of vigilance.
Facial expressions can also add depth to your insect portraits. Some insects, like bees and wasps, have distinct facial features that allow for nuanced expression – you can draw the corners of their mouths upwards or downwards to convey different emotions.
Posture is another vital aspect of portraiture in insect drawings. Consider how each species typically holds itself: a butterfly might be depicted with its wings spread wide, while an ant could be shown carrying loads on its back.
To begin capturing these subtleties, study the behavior and body language of insects in their natural habitats or through photographs. Observe how they interact with one another, their environments, and themselves – this will help you understand their unique personalities and expressions.
Tips for Practice and Improvement
To really master drawing insects, it’s essential to put your skills into practice regularly, which is why we’ve compiled some valuable tips to help you improve. Start by dedicating time each day to sketching the tiny creatures that surround us.
Common Mistakes to Avoid
When drawing insects, beginners often struggle with proportion and scale. One common mistake is making the body parts too large or too small in relation to each other. For example, a bee’s thorax might be exaggeratedly wide, while its abdomen appears too narrow. To avoid this error, study photographs of your chosen insect species from multiple angles. Pay attention to how the body parts interact with one another and use these observations as references for your drawings.
Another mistake is neglecting to observe the intricate details that distinguish different insects. A butterfly’s wings, for instance, feature distinctive veins and scales that are often overlooked in amateur drawings. To correct this, focus on accurately rendering textures and patterns, rather than relying on broad brushstrokes or generic shapes.
Additionally, beginners may struggle with capturing the subtle nuances of insect anatomy. For example, the delicate structure of an ant’s head or the unique shape of a beetle’s thorax can be challenging to render convincingly. To improve in this area, practice drawing from life (if possible) and study the work of experienced artists who specialize in insect illustration.
Encouraging Continued Learning and Growth
As you continue to practice drawing insects, it’s essential to encourage continued learning and growth. One way to do this is by regularly observing and studying the natural world around you. Visit local parks or gardens to observe insects up close, taking note of their unique characteristics, behaviors, and habitats.
Setting achievable goals for yourself can also help motivate your practice. Try drawing a specific type of insect each week, such as bees, butterflies, or ants. As you become more confident in your skills, aim to tackle more complex subjects like dragonflies or cicadas.
Joining a community of fellow insect enthusiasts can be a great way to stay inspired and learn from others. Look for online forums, social media groups, or local art clubs where you can share your work, get feedback, and explore new techniques together.
To further challenge yourself, try experimenting with different drawing tools, such as ink brushes, colored pencils, or watercolors. You can also create your own reference sheets by collecting images of insects from various sources, then practicing drawing them from memory.
Remember that progress may be slow at times, but the key is to stay consistent and enjoy the process of learning.
Frequently Asked Questions
What if I get frustrated with my drawings and feel like giving up?
Don’t let frustration get the best of you! It’s normal to feel overwhelmed when learning something new, especially when it comes to drawing. Take breaks, practice regularly, and remind yourself that improvement takes time. You can also try joining a community or finding an online mentor for support.
How do I know if my drawings are realistic enough?
Realism is subjective, but here’s a tip: focus on observing the world around you and studying insect anatomy in detail. Pay attention to textures, patterns, and proportions. Practice drawing from life or using reference images to get a better understanding of what makes an insect look real.
Can I use digital tools for drawing insects, or do I need traditional media?
You can definitely use digital tools like graphic tablets, apps, or software to draw insects. In fact, many artists prefer digital media for its flexibility and versatility. However, if you want to achieve a more organic feel or experiment with textures, traditional media like pencils, charcoal, or ink might be the way to go.
How long does it take to become proficient in drawing insects?
Becoming proficient takes time, patience, and consistent practice. It’s difficult to put a specific timeframe on it, as progress varies from person to person. Set realistic goals for yourself, break your learning process into smaller steps, and focus on enjoying the journey rather than rushing to achieve perfection.
What if I want to draw insects in motion or with dynamic poses?
Capturing movement and action is an exciting challenge! To tackle this, study anatomy in motion by observing insects flying or crawling in real life. Practice drawing simple gestures and movements before trying more complex poses. Use reference images or videos to help you achieve a sense of dynamism and energy in your drawings.