
Nature photography is more than just capturing breathtaking landscapes or wildlife moments – it’s also about documenting species behavior, habitats, and ecosystems to raise awareness and understanding. As an aspiring nature photographer, you’ve likely encountered situations where your shots fell short of conveying the essence of a particular scene. This could be due to inadequate equipment settings, misplaced composition, or inefficient editing skills. To overcome these challenges, it’s crucial to learn essential techniques that balance aesthetics with documentation goals. In this article, we’ll explore key methods for capturing stunning nature photographs, including tips on camera settings, composition strategies, and post-processing skills tailored specifically for documenting the natural world effectively. By the end of this guide, you’ll be equipped with the knowledge to capture compelling images that inform and inspire others about our planet’s incredible ecosystems.
Essential Equipment and Settings
To effectively document nature, you’ll need a range of equipment and settings that help capture the subtleties of your subject matter. Let’s take a look at some essential gear and techniques to get started.
Choosing the Right Camera and Lens
When it comes to nature photography documentation, a good camera body and lens selection are essential for capturing high-quality images. A DSLR or mirrorless camera is ideal, as they offer excellent image quality, manual controls, and the ability to change lenses. When choosing a camera, consider factors such as weather sealing, battery life, and weight.
For nature photography, a wide-angle zoom lens (between 10-24mm) is often preferred for its versatility in capturing expansive landscapes and close-up details. However, if you’re focusing on wildlife or macro photography, a prime lens (e.g., 100mm or 200mm) can provide sharper images with greater depth of field control.
Image stabilization is also crucial when shooting handheld or in low light conditions. Look for lenses with built-in image stabilization (IS) or optical stabilization (OS), which help reduce camera shake and blur. Some popular lens options include the Tamron 15-30mm f/2.8-4 Di VC USD G2 or the Nikon 14-24mm f/2.8G ED.
When selecting a lens, consider the type of photography you’ll be doing most often, as well as any specific requirements for your projects (e.g., extreme weather conditions).
Understanding ISO, Aperture, and Shutter Speed
The exposure triangle of ISO, aperture, and shutter speed is a fundamental concept for photographers to grasp. Understanding how these three settings interact with each other will allow you to capture high-quality images in various lighting conditions.
ISO determines the camera’s sensitivity to light, ranging from low (100) to high (6400). In nature photography, you’ll often use lower ISOs (100-400) to minimize noise and digital artifacts. For example, if you’re photographing a bird in bright sunlight, an ISO of 200 will help prevent overexposure.
Aperture controls the amount of light entering the lens and affects the depth of field. A large aperture (small f-stop number) will create a shallow depth of field, while a small aperture (large f-stop number) will produce a deeper depth of field. In nature photography, you may want to use a smaller aperture (f/8-f/11) to ensure that multiple elements in the scene are in focus.
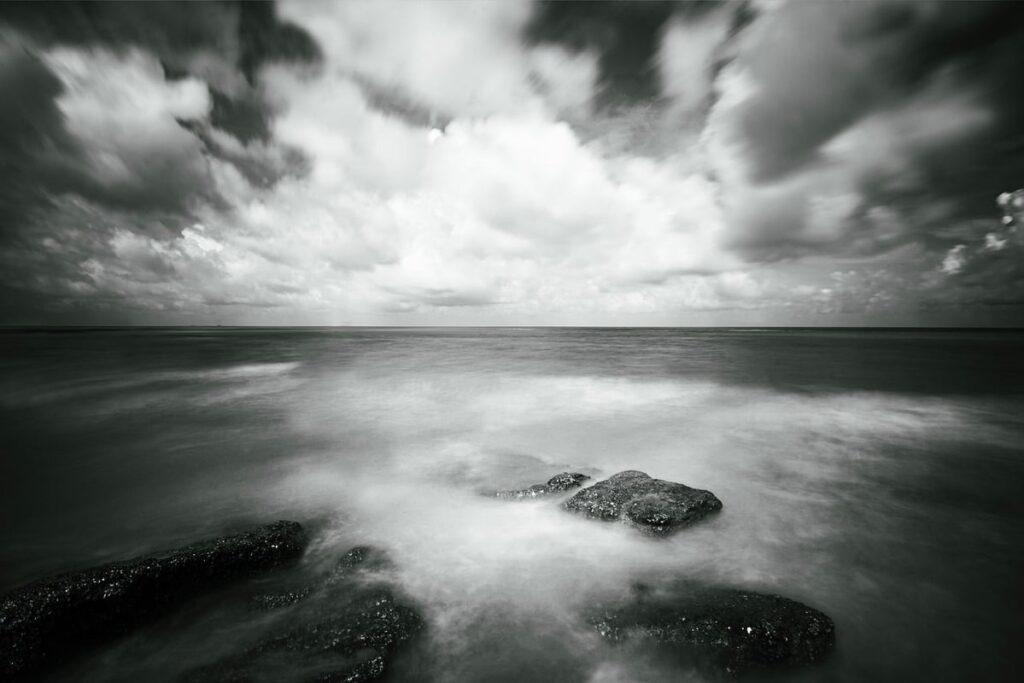
Shutter speed determines the duration the camera’s shutter is open. Faster shutter speeds (1/1000th of a second or faster) are ideal for capturing moving subjects, such as waterfalls or birds in flight. Slower shutter speeds (1-2 seconds) can create artistic effects like blur and motion. When photographing static scenes, you can often use a slower shutter speed to capture more detail.
When shooting in low-light conditions, consider using a tripod to prevent camera shake and ensure sharper images.
Camera Settings for Different Environments
When photographing nature in different environments, camera settings play a crucial role in capturing the desired results. For instance, when shooting in a forest, a slower shutter speed can create a sense of movement and blur, emphasizing the vegetation’s texture and flow. A shutter speed of 1/15s to 1/30s is often suitable for this environment.
In contrast, desert landscapes often require a faster shutter speed to freeze the sand or dust particles in mid-air, preventing them from appearing as motion blurs. Typically, a shutter speed of 1/125s to 1/250s is ideal for capturing these details. Moreover, when shooting near water or underwater scenarios, consider using a polarizing filter to reduce glare and enhance color saturation.
It’s also essential to adjust the white balance according to the environment. For example, in overcast conditions, you can use a slightly warmer white balance to compensate for the cold tones. Conversely, in bright sunlight, a cooler white balance may be required to prevent overexposure. By understanding these specific camera settings for different environments, nature photographers can better document their subjects and achieve the desired aesthetic.
Preparing for Your Photography Session
Before your nature photography session, it’s essential to prepare by understanding the type of documentation you need and gathering all necessary equipment and information. This helps ensure a smooth and productive shoot.
Understanding the Subject and Location
When photographing nature for documentation purposes, understanding the subject’s behavior, habitat, and optimal location is crucial. This knowledge helps you anticipate and capture key moments, as well as ensure the safety of both yourself and the subject.
Start by researching the subject’s typical habits and habitats. For example, if you’re photographing a specific bird species, learn about its migratory patterns, feeding times, and preferred nesting areas. Observe your subject in its natural environment to gain a deeper understanding of its behavior and interactions with its surroundings.
Consider factors like lighting, accessibility, and potential distractions when selecting the optimal location for your photography session. For instance, if you’re photographing a specific type of plant or flower, choose a location that receives consistent sunlight during the desired time of day. Be mindful of other environmental factors such as wind, rain, or extreme temperatures that may impact your subject’s behavior and your ability to capture high-quality images.
Understanding the subject’s habitat also helps you anticipate potential hazards like wildlife encounters, harsh weather conditions, or restricted access areas. By knowing the optimal location for photography, you can minimize risks and maximize the effectiveness of your documentation efforts.
Identifying and Avoiding Distractions
When photographing nature for documentation purposes, it’s essential to identify and avoid distractions that can detract from the main subject. These distractions can come in many forms, including humans, vehicles, other animals, or even environmental factors like strong winds or harsh lighting.
Start by scouting the location before the photography session to anticipate potential distractions. Look for areas where humans tend to congregate, such as trails, picnic areas, or parking lots. Also, consider the time of day and how it may impact the scene – early morning or late afternoon are often best for avoiding human traffic.
When you’re on location, keep an eye out for other animals that might enter the frame. This could be a curious deer wandering into your shot or a bird perched on a nearby branch. Be prepared to adapt your composition if necessary to exclude these distractions.
To minimize distractions, consider using a longer focal length lens (at least 200mm) to compress the scene and reduce the likelihood of unwanted elements entering the frame. You can also plan your shots around the subject’s behavior and movement patterns to capture them in their natural habitat.
Pre-Photography Planning and Safety Considerations
Before heading out on a nature photography documentation session, it’s essential to plan and prepare for potential hazards. Research the location and understand any specific regulations or restrictions. Check the weather forecast and be prepared for changing conditions, such as sudden rain showers or extreme heat.
Bring a first aid kit and know basic first aid procedures in case of an emergency. Familiarize yourself with local wildlife and their habitats to avoid disturbing or provoking animals. Pack essential safety gear like bear spray (if necessary) and a portable phone charger.
Consider downloading a GPS tracking app on your smartphone to help navigate the terrain and stay connected. Leave a copy of your itinerary with someone trusted, including your planned route and estimated return time. Don’t venture into areas with sensitive or protected ecosystems without proper permits and documentation.
In remote locations, let someone know your expected return time. Pack emergency supplies like food, water, and a portable shelter in case you’re stranded overnight. Keep a map of the area handy, and consider bringing a personal locator beacon (PLB) if you’ll be venturing into areas with no cell service.
Composition Techniques for Effective Documentation
When it comes to capturing nature scenes, a well-executed composition can make all the difference in conveying your message through documentation. We’ll explore key techniques to guide you in crafting effective compositions.
Rule of Thirds and Leading Lines
When applying composition techniques to nature photography, two essential tools are the rule of thirds and leading lines. The rule of thirds involves dividing the frame into nine equal parts by imagining two horizontal lines and two vertical lines. Place important elements along these lines or at their intersections for a more balanced and visually appealing image.
For instance, when capturing a majestic mountain landscape, position the peak where the top-left third and middle vertical line intersect. This composition technique draws the viewer’s eye to the central subject and creates a sense of harmony. Leading lines are another effective tool, using natural features like riverbeds, coastlines, or paths to guide the viewer’s gaze through the image.
To incorporate leading lines effectively, look for scenes where a clear path leads the viewer’s eye towards the main subject. A winding trail through the forest, a beach with receding waves, or a rocky shoreline can all be used to create a sense of depth and draw attention to the central element. By incorporating these composition techniques into your nature photography documentation, you’ll enhance the visual impact of your images and tell more compelling stories about the natural world.
Incorporating Depth of Field and Focus Stacking
To achieve high-quality images, nature photographers often rely on advanced composition techniques like depth of field manipulation and focus stacking. Depth of field refers to the area within an image where objects appear sharp. By manipulating aperture, you can control this zone. A large aperture (small f-stop number) creates a shallow depth of field, blurring backgrounds and emphasizing subjects. Conversely, a small aperture (large f-stop number) produces a deep depth of field, keeping more elements in focus.
Focus stacking involves capturing multiple images at different focal points and combining them using software. This technique is particularly useful for showcasing intricate details in complex subjects like flowers or insects. To achieve effective focus stacking, you’ll need to use a tripod, shoot with a small aperture (high f-stop number), and overlap your focus areas slightly between shots.
When incorporating depth of field and focus stacking into your nature photography documentation, consider the following best practices:
- Use a tripod to maintain camera stability
- Shoot in RAW for greater flexibility during post-processing
- Experiment with different apertures and focal lengths to achieve desired effects
- Pay attention to lighting conditions, as harsh shadows can affect image quality
Balancing Elements in a Frame
When balancing different elements within a frame, you’re aiming to create visual harmony and draw attention to specific features. Start by identifying the main subject – whether it’s a majestic tree, a delicate flower, or an intricate rock formation – and consider what other elements should be included to support its narrative.
Consider the rule of thirds: place your main subject along one of the lines or at their intersections, and then balance it with complementary elements. For instance, position a bright blue sky above or below a dense forest canopy, creating a sense of depth and contrast. Alternatively, use leading lines – like a winding path or a serpentine river – to guide the viewer’s eye toward your subject.
To avoid visual overload, limit the number of distinct elements within your frame. A small cluster of colorful flowers can be balanced by a blurred background; conversely, a sweeping landscape with multiple focal points may benefit from a more subtle color palette and carefully chosen composition lines. Remember that balance is not about symmetry but rather creating equilibrium through thoughtfully arranged visual components.
Editing and Post-Processing Techniques
To create visually stunning images, you’ll want to learn some key editing and post-processing techniques that enhance your nature photography without compromising its authenticity. Effective use of these tools is crucial in documentation.
Basic Image Editing Steps
Adjusting brightness, contrast, and color balance is a crucial part of image editing in nature photography. You’ll want to start by reviewing the image for overall brightness and exposure levels. If necessary, make adjustments using the exposure slider, which can be found in most photo editing software. Be cautious not to overcorrect, as this can lead to unnatural-looking images.
Next, address contrast issues. This is particularly important when working with images taken in high-contrast environments, such as bright skies and dark shadows. Use the contrast slider to balance out these elements, but avoid making extreme adjustments that can create an artificial look.
Color balance is also essential for capturing the natural tones of your subject. You may need to make adjustments to white balance settings if the image has a color cast due to lighting conditions. For example, if you’re shooting near a body of water, you may need to adjust the blue tone to remove an unnatural hue.
Advanced Techniques for Enhancing Images
When it comes to enhancing nature photography images, advanced techniques can make a significant difference in bringing out details and capturing subtle nuances. Noise reduction is a crucial step in preserving image quality, especially when shooting in low-light conditions or high ISOs. You can use tools like the “Dust and Scratches” filter or dedicated noise-reduction plugins to identify and remove unwanted artifacts.
Sharpening is another essential technique for enhancing details and textures in images. However, over-sharpening can lead to halos or unnatural edges. To avoid this, apply subtle sharpening adjustments using local tools like the “Adjustment Brush” or “Gradient Filter,” focusing on specific areas of interest rather than applying global sharpening.
Local adjustments allow you to fine-tune image details without affecting other areas. This is particularly useful for balancing exposure and color in complex scenes with multiple light sources. By selecting specific areas of interest, you can make targeted adjustments to shadow recovery, highlights, or color balance, ensuring that your images accurately represent the scene’s natural tones and lighting conditions.
When working with challenging image files, consider using tools like HDR merge or focus stacking to combine multiple exposures or shots into a single, refined image.
Tips for Capturing Action and Behavior
To effectively document nature, you’ll want to capture action and behavior in your photographs, which can be challenging due to their fast-paced nature.
Anticipating and Capturing Key Moments
When photographing nature scenes for documentation purposes, anticipating and capturing key moments can elevate your images from ordinary to extraordinary. These critical moments often involve complex behaviors like mating rituals, predator-prey interactions, or dramatic weather events.
To anticipate such moments, you need to research the subject’s behavior patterns and study its habitats. This knowledge will allow you to position yourself at vantage points where you’re likely to capture these critical scenes. For instance, if you’re photographing a bird species known for their elaborate courtship displays, you should arrive early to secure a spot with an unobstructed view.
Once you’ve anticipated the key moment, it’s essential to be prepared to capture it without hesitation. Familiarize yourself with your camera settings and ensure that you have sufficient battery life, storage space, and a reliable shutter release. In terms of composition, focus on capturing the action and behavior within the context of its environment.
In practice, anticipating key moments often requires patience and persistence. Be prepared to spend extended periods waiting for the perfect shot, as this can be just as critical as the technical aspects of photography.
Understanding and Capturing Animal Behavior
When capturing animal behavior through photography, it’s essential to understand their natural habits and patterns. Start by observing the animals’ daily routines and identifying key moments of interest. For instance, birds are often most active during dawn and dusk, while mammals tend to be more active at night. Recognize that each species has its unique characteristics, such as a migratory pattern or a specific feeding behavior.
Look for signs of body language, like postures, facial expressions, or even subtle movements. For example, a bird’s tail feathers may indicate aggression or courtship. A photograph capturing the exact moment an animal exhibits this behavior can be incredibly valuable. To effectively capture these moments, consider using a slower shutter speed to convey movement and blur. You can also use a telephoto lens to maintain a safe distance while still framing intimate shots.
Be prepared to spend time waiting for animals to exhibit interesting behavior. Bring snacks, water, and patience – it’s not uncommon for hours to pass before an exciting moment unfolds. Use this downtime to learn more about the species you’re photographing and their habitats.
Best Practices for Sharing Your Work
When sharing your nature photography online, it’s essential to consider how you present and label your work to ensure accurate interpretation by viewers. Proper captioning and attribution can make a big difference in conveying the story behind each image.
Copyright and Licensing Considerations
When sharing your nature photography documentation online, it’s essential to consider copyright and licensing laws. As a photographer, you own the rights to your images, but there are specific guidelines for sharing them with others.
To avoid potential issues, research the terms of use for platforms like Flickr, Instagram, or 500px, where you plan to share your work. Understand that by posting photos on these sites, you may be granting a non-exclusive license to use and distribute your images. Be aware that some websites have strict rules against commercial use or require attribution.
If you plan to sell your nature photography documentation, consider obtaining the necessary licenses for specific locations or species. For example, if you photograph endangered animals in protected areas, ensure you have the required permits and permissions.
When licensing your photos, clearly define the usage rights, such as non-commercial or editorial purposes only. Consider using Creative Commons licenses, which allow you to specify how others can use and distribute your work. Be cautious of royalty-free or stock image websites that may require exclusive rights to your images.
Creating Engaging Content
When sharing your nature photography documentation online, a well-crafted caption can elevate an image from visually appealing to informative and engaging. Consider including context about the location, time of year, and any specific behaviors or patterns observed. For instance, if you’ve captured a unique migration pattern, mention the species, date, and weather conditions.
Informative videos are another effective way to engage audiences. These can range from short tutorials on camera settings for specific environments to in-depth analysis of your photography techniques. Break down complex concepts into bite-sized chunks, using visuals and captions to aid comprehension. Utilize platforms like YouTube or Vimeo to host your videos, making sure to include relevant keywords for discoverability.
Social media platforms offer a wealth of opportunities to showcase your work and connect with potential viewers. When sharing images on Instagram or Facebook, use a mix of hashtags to reach specific audiences interested in nature photography, conservation, or wildlife documentation. For example, #wildlifephotography, #natureconservation, or #documentaryphotography can be effective starting points.
Frequently Asked Questions
Can I Use My Smartphone for Nature Photography Documentation?
Yes, many professional nature photographers use smartphones as their primary camera due to advancements in image quality and versatility. However, consider investing in a good smartphone camera attachment or an external lens for improved performance.
How Do I Adapt Composition Techniques for Different Environments?
Adapting composition techniques depends on the environment’s unique features and challenges. For example, when photographing in low light conditions, use slower shutter speeds to capture more ambient light. When documenting fast-moving subjects, focus on leading lines and motion blur to convey speed.
What If I Encounter Inclement Weather During My Photography Session?
If you encounter inclement weather during your photography session, prioritize safety and seek shelter if possible. Use a rain cover or umbrella to protect your equipment from the elements. In some cases, challenging weather conditions can create unique and dramatic photographs, so be prepared to adapt your composition techniques accordingly.
Can I Edit My Photos in Any Software, or Are There Specific Requirements?
While various image editing software can work for nature photography documentation, consider using specialized tools like Adobe Lightroom or Skylum Luminar. These programs offer advanced features tailored to photographers’ needs, such as noise reduction and color grading.
How Do I Ensure My Work is Properly Licensed and Credited When Sharing It?
When sharing your work with others, ensure you have the necessary licenses and permissions in place. Clearly credit the original source of any images or footage used in your documentation. Consider registering your work under copyright laws to protect your intellectual property.