
For many collectors and enthusiasts, identifying antique garden tools is a fascinating pursuit that can reveal the history and craftsmanship behind these often-overlooked treasures. But with so many styles, materials, and historical periods to consider, it’s easy to get lost in the process. If you’ve ever stumbled upon an old hoe or trowel at a garage sale or estate auction, only to wonder what era it hailed from or how much it might be worth, this guide is for you.
As we explore the world of antique garden tools together, we’ll cover not just their history and evolution over time but also practical tips on materials, inspection techniques, and preservation methods. From the distinctive markings of Japanese steel to the sturdy handles of early 20th-century American tools, every detail has a story to tell. By the end of this article, you’ll have a solid foundation for identifying antique garden tools and be able to date them with confidence.
Understanding Antique Garden Tools
Antique garden tools are a treasure trove of history and craftsmanship, but understanding their origins can be a challenge. Let’s examine the characteristics that distinguish antique garden tools from modern ones.
What Makes a Tool Antique?
To determine if a garden tool is antique, consider its age, condition, and historical significance. Antique tools are typically defined as those made before 1900, but some collectors and enthusiasts may consider items from the early 20th century to be antiques as well.
Look for signs of wear and tear that indicate the tool has been in use for a long time. Check for rust, corrosion, or other forms of damage that can occur over time. Also, examine the tool’s construction, materials, and design features. Antique tools often showcase traditional craftsmanship, such as hand-forged metalwork or wooden handles.
Some common characteristics of antique garden tools include:
• Hand-forged steel blades with distinctive patterns
• Wooden handles made from hardwoods like oak or ash
• Metal parts that are not mass-produced but rather crafted individually
• Decorative engravings or etchings on the tool’s surface
Keep in mind that these features alone do not guarantee an antique, as some newer tools may be designed to mimic traditional styles. However, if you find a tool with a combination of these characteristics and a provenance or documentation that suggests it is old, it may indeed be an antique garden tool.
Common Materials Used in Antique Tools
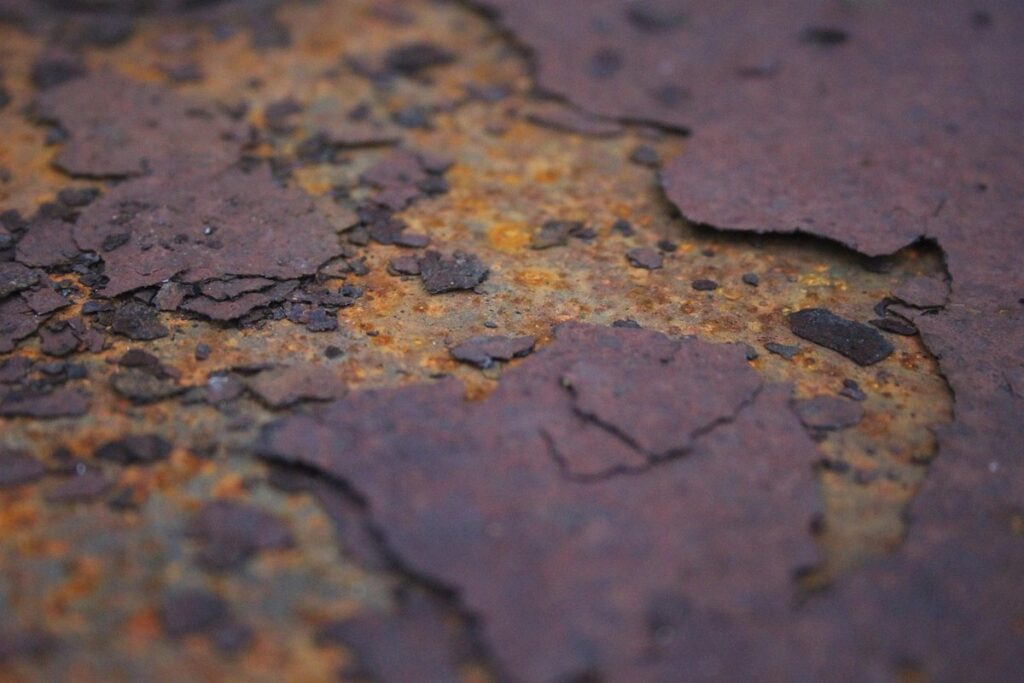
Iron was a primary material for garden tools during the 18th and early 19th centuries. You can identify iron tools by their distinctive color and texture; they often exhibit rust, patina, or a smooth, weathered finish. Some iron tools were forged from high-carbon steel, which made them stronger and more durable.
Wooden handles were also common on antique garden tools. Look for signs of wear on the wood, such as cracks, splits, or scratches. The type of wood used can indicate the tool’s age and place of origin; for example, ash and hawthorn were popular choices in Europe due to their strength and flexibility.
Bone was sometimes used for handles, particularly for smaller tools like trowels and cultivators. Bone is relatively soft and prone to damage, so it may show signs of wear or loss over time. Additionally, some antique garden tools feature heads made from copper, bronze, or other metals, which were valued for their durability and resistance to corrosion.
Some common types of bone used in handles include cow femur, ox shoulder blade, and deer antler. These materials were often chosen for their strength and resilience, as well as their availability in rural areas where garden tools were often crafted.
Researching the History of Garden Tools
To identify antique garden tools accurately, it helps to understand their historical context and how they’ve evolved over time. This section will take a closer look at researching the history of these unique gardening instruments.
Historical Context: Tool Evolution Over Time
Garden tool designs have undergone significant transformations over time, influenced by technological advancements and changing agricultural practices. The earliest tools were simple and hand-forged, with iron becoming a primary material during the Middle Ages. As industrialization took hold, mass production techniques improved tool quality and reduced costs. The introduction of steel in the 18th century marked another milestone, allowing for more durable and versatile tools.
Innovations like the interchangeable blade and the development of new materials, such as copper and bronze, also contributed to this evolution. These advancements allowed for lighter, stronger tools that could handle a variety of tasks. For example, the introduction of the sickle bar in the late 19th century enabled farmers to harvest grain more efficiently.
The early 20th century saw significant changes with the introduction of power tools and machinery. Rakes and hoes began to feature mechanized components, streamlining garden work for large-scale operations. Today’s gardeners can still appreciate these historical developments by identifying distinctive design elements in antique tools, such as forged metal handles or wooden grips. By understanding this tool evolution, collectors can better date and identify their finds, adding context to their collections.
Identifying Regional Styles and Influences
When examining antique garden tools, it’s essential to consider regional styles and influences. Different countries and cultures have their unique approaches to tool design and construction, which can be reflected in various features, materials, and craftsmanship. For instance, Japanese gardening tools often feature minimalist designs with an emphasis on simplicity and functionality, whereas British garden tools from the 18th century might showcase intricate metalwork and ornate details.
To identify regional styles and influences, look for specific characteristics such as handle materials (e.g., wood, bamboo, or horn), metal types (e.g., iron, steel, or bronze), and tool shapes. For example, Scandinavian garden tools often have long-handled rakes with wooden or metal frames, while French tools might feature shorter handles and more delicate designs.
Some notable regional styles to be aware of include:
• Japanese: Simple, functional designs with a focus on natural materials
• British (18th-19th centuries): Intricate metalwork, ornate details, and high-quality craftsmanship
• German (mid-20th century): Use of durable, rust-resistant materials like stainless steel and aluminum
• American (early 20th century): Incorporation of new technologies, such as electric motors and nylon handles
Inspecting the Tool Itself
Take a closer look at the tool itself, examining its materials, craftsmanship, and any distinctive features that can help pinpoint its age and origin. A keen eye for detail is essential here.
Visual Inspection: What to Look for in an Antique Garden Tool
When conducting a visual inspection of an antique garden tool, pay attention to signs of wear and patina. Look for areas where the metal has developed a rich, even tone, often indicating age and use. Check for scratches, dents, or other damage that may have occurred during handling or storage. Note whether any parts appear to be missing or replaced.
Inspect the handle, paying attention to the type of material used and its condition. Wooden handles may show signs of wear on the grip, while metal handles might display patina or rust spots. Examine the tool’s head and blade for any signs of repair or replacement. If a blade appears dull or worn, it could be a sign that it has been sharpened or replaced over time.
Also, look for any unusual features or design elements that may indicate the tool’s age or origin. For example, some antique garden tools feature intricate engravings or markings on the handle or head. Take note of these details and use them as clues in your identification process.
Checking for Makers’ Marks and Signatures
When inspecting an antique garden tool, one of the most crucial steps is to check for makers’ marks and signatures. These distinctive features can provide valuable clues about the tool’s origins, age, and authenticity.
Look for stamps, initials, or logos etched into the metal or carved into the handle. Some manufacturers used these marks as a way to sign their work, while others used them to indicate specific materials or production periods. For example, the British company, Ransomes, Sewell & Sims, often stamped their tools with a small crown logo.
Check for other distinctive features such as hand-engraved designs, intricate tooling, or unusual craftsmanship. These details can be indicative of a particular region or time period. For instance, garden forks from 19th-century Europe might feature ornate engravings on the handle.
If you suspect that your antique tool bears a makers’ mark, research the manufacturer’s history and production periods to narrow down its potential age range. Consult reference books, online forums, or expert collectors for guidance on interpreting these marks and signatures.
Dating and Valuing Your Find
Now that you’ve identified your antique garden tool, it’s essential to date and value it accurately, which can significantly impact its worth and collectibility. This process requires a careful examination of materials, craftsmanship, and historical context.
Establishing a Date Range: Radiocarbon Dating and Other Methods
Radiocarbon dating is a laboratory technique used to estimate the age of an organic material. However, it’s typically applied to artifacts from the last 50,000 years and may not be suitable for antique garden tools made from materials like metal or wood that are less than 1,000 years old. For these cases, other methods come into play.
One such method is dendrochronology – the study of tree-ring patterns. This technique can provide a precise date range by analyzing the growth rings of a wooden handle or other parts of the tool. The width and pattern of the rings can indicate the time of year the tree was harvested, as well as the climate conditions during that period.
Another approach is to examine the tool’s design and construction in relation to historical styles. For example, a metal tool with a distinctive curved blade might be dated to the early 20th century, while one with a more ornate handle could be from the Victorian era. By combining these techniques – or using them in conjunction with other methods like maker’s marks or regional influences – you can establish a reasonable date range for your antique garden tool.
Factors Affecting Value: Condition, Rarity, and Provenance
The value of an antique garden tool is influenced by several key factors, with condition, rarity, and provenance being the most significant. Condition plays a crucial role, as minor scratches or dents can significantly reduce the tool’s worth. A general rule of thumb is that any damage affecting functionality will decrease the value by 20-30%. Conversely, tools in excellent condition, particularly those retaining their original patina, can command higher prices.
Rarity also greatly impacts an antique garden tool’s value. For instance, a unique or limited-edition piece from a renowned manufacturer may be highly sought after and valuable. Conversely, common or mass-produced tools will be worth less due to overabundance. It’s essential to research the specific type of tool, its production period, and any notable sales records.
Provenance – the history and ownership of the tool – is also crucial in determining value. If an antique garden tool has been part of a significant collection or has undergone restoration by a reputable conservator, it will likely increase its value. In some cases, documentation from previous owners can add substantial value to the tool.
Restoring and Preserving Antique Garden Tools
Antique garden tools are more than just relics of the past, they’re also valuable collectibles that require special care. Learning how to restore and preserve these delicate items is a crucial part of their conservation.
Basic Cleaning and Conservation Techniques
When cleaning an antique garden tool, it’s essential to avoid harsh chemicals and abrasive materials that can damage its original finish or compromise its structural integrity. Start by gently brushing off loose dirt and debris with a soft-bristled brush to prevent scratches.
For more thorough cleaning, use a mild soap solution or a specialized metal cleaner specifically designed for antique tools. Apply the cleaner with a soft cloth, working from the top down to prevent drips and water spots. Avoid getting moisture into crevices, joints, or other small areas where it can collect and cause damage.
To dry the tool, use a clean towel or let it air-dry away from direct sunlight. For tools with intricate carvings or engravings, use a soft-bristled brush to gently sweep away dust and debris. When handling antique tools, always wear gloves to prevent oils from your skin from transferring to the metal.
In addition to cleaning, consider applying a protective coating, such as beeswax or a specialized wax polish, to maintain the tool’s finish and protect it from future damage. Avoid using silicone-based products, which can leave behind a residue that attracts dust and dirt.
Advanced Restoration Methods: When to Seek Professional Help
When dealing with advanced restoration methods for antique garden tools, it’s essential to know when to seek professional help. A conservator or restorer with experience in metalwork, woodworking, or other relevant fields can make a significant difference in preserving the tool’s integrity and authenticity.
Typically, you should consider seeking professional help if the tool requires complex repairs, such as reattaching broken handles, repairing rusted hinges, or rebuilding damaged wooden components. A conservator will have access to specialized equipment and expertise to tackle these tasks without causing further damage.
When selecting a service provider, look for one with experience in restoring antique garden tools or similar materials. Check their portfolio, read reviews, and ask about their approach to conservation versus restoration. Be wary of providers who promise to “make the tool like new” or use modern materials, as this can compromise the tool’s historical value.
A professional conservator will work with you to determine the best course of action, taking into account the tool’s condition, rarity, and provenance. They may also provide guidance on how to properly store and display your restored tool to ensure its longevity.
Displaying and Caring for Your Antique Garden Tools
Now that you’ve identified your antique garden tools, let’s focus on how to display them proudly while keeping them in top condition. Proper care will ensure their longevity and beauty.
Storage and Display Ideas: Showcasing Your Collection
When storing and displaying antique garden tools, it’s essential to strike a balance between showcasing them as decorative pieces and maintaining their condition. A well-designed display can elevate your collection, while improper storage or handling can lead to damage.
To store tools that are not on display, consider using wooden chests or cabinets with ventilated compartments. These allow for airflow, which helps prevent rust and corrosion. You can also use acid-free tissue paper to wrap delicate items like trowels or cultivators. Label each container clearly so you can easily identify the contents.
For displaying your collection, think about creating a focal point in your garden or home. Group similar tools together on a wooden rack or shelf, such as all your vintage watering cans or pruning shears. Consider hanging larger items like rakes or hoes from hooks or a pegboard to maximize space and create visual interest. Finally, leave some empty space around each tool to allow for easy viewing and to prevent overcrowding. This will help you appreciate the intricate details of each piece while keeping them safe from damage.
Handling and Maintenance Tips: Ensuring Long-Term Preservation
When handling antique garden tools, it’s essential to adopt gentle and careful techniques to prevent damage. Start by gently dusting off loose debris with a soft-bristled brush, working from top to bottom to avoid scratching the tool’s surface. For more thorough cleaning, use a mild soap solution and a soft cloth, but be sure to rinse thoroughly to prevent any harsh chemicals from seeping into the tool’s materials.
To maintain your antique garden tools in pristine condition, store them in a dry, cool place away from direct sunlight. Avoid stacking or overcrowding storage areas, as this can cause unnecessary wear and tear on delicate handles and blades. Regularly inspect your collection for signs of moisture, warping, or pest infestation, addressing any issues promptly to prevent further damage.
In terms of maintenance, consider applying a small amount of wax or oil to metal components every few months to maintain their luster and prevent rust. For wooden handles, use a gentle wood conditioner to keep the material from drying out and cracking. By following these simple handling and maintenance tips, you can ensure your antique garden tools remain in good condition for generations to come, allowing future collectors to appreciate their beauty and craftsmanship.
Frequently Asked Questions
What if I’ve already cleaned and restored my antique garden tool, but now I’m unsure about its authenticity?
Yes, it’s not uncommon for restorations to raise concerns about an item’s originality. To verify the tool’s age and provenance, consult with a professional conservator or appraiser who can examine the tool’s materials, construction, and any remaining maker’s marks.
How do I know when it’s worth seeking professional help for restoring my antique garden tool?
If you’re unsure about handling specific restoration techniques, have found signs of significant wear or damage, or are dealing with an unusually rare or valuable item, consider consulting a professional conservator. They can assess the tool and provide guidance on the best approach.
Can I use any cleaning products on my antique garden tools to maintain their condition?
No, using harsh chemicals or abrasive cleaners can damage the original finish and compromise the tool’s structural integrity. Instead, opt for gentle cleaning methods recommended in the article, such as dusting with a soft brush and applying a small amount of oil to metal parts.
What if I’ve found an antique garden tool but have no information about its history or origin?
While it can be challenging to determine the tool’s specific history without documentation, you can try researching regional styles and influences to narrow down possible origins. Additionally, consult with local historians, collectors, or museum experts who may be able to provide insight into similar tools.
How often should I inspect my antique garden tools for signs of damage or wear?
Regular inspections are essential to maintaining the condition and longevity of your collection. Set aside time each season to examine your tools, paying attention to any changes in their appearance or functionality. Addressing issues promptly can prevent more extensive damage from occurring.